HDR indicates high dynamic range. In photography, dynamic range is the range of the darkest tones to the lightest tones within a photograph. In simpler terms, dynamic range is a measure of the light acuteness from the shadows to the highlights.
You can use this technique to capture a broader range of tones and details in your photographs. The characteristic feature of HDR photography is that you combine multiple exposures of the same subject to create a stunning image that showcases both the shadows and highlights in a way that you cannot achieve with a single exposure.
The Science Behind HDR Photography
The way the human eye perceives light is different than that of camera sensors. The human eye has the remarkable ability to adapt to different lighting conditions, enabling it to see both dark shadows and bright highlights simultaneously.
Camera sensors, however, have their limitations. As a result, it could lead to underexposed shadows or overexposed highlights in a single exposure.
You are probably wondering how HDR photography bridges this gap between the human eye and camera sensors. It’s here that capturing several exposures at different settings plays a crucial role. You can mimic the way your eyes perceive a scene by deliberately overexposing some shots to capture the shadows and underexposing others to capture the highlights.
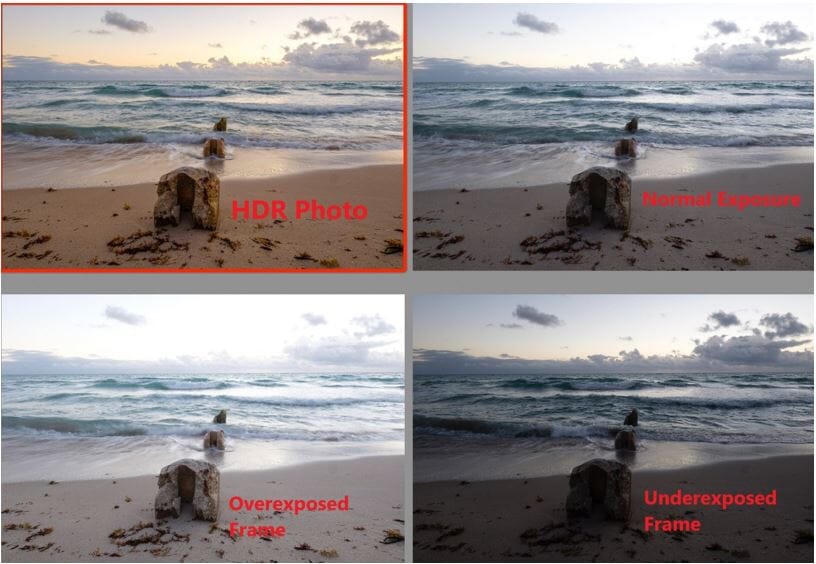
A standard HDR photograph comprises one image that is 2 stops underexposed (too dark), one image that is exposed normally, and one image that is 2 stops overexposed (too bright). This is a bracketed set (−2, 0, +2).
You can capture more images if you desire, such as (−4, −3, −2, −1, 0, +1, +2, +3, +4) or a (−4, −2, 0, +2, +4). However, not all cameras can automatically take that many. You may have to do it manually by changing the shutter speed for every individual exposure.
Once you have captured multiple exposures, specialized software comes into play. (You can choose from a range of HDR software.) The software analyses each exposure and blends them, choosing the best parts from each exposure to create a final photograph that represents the complete dynamic range of the subject to perfection.
The goal of HDR photography is for the final photograph to showcase the elaborate details in the brightest as well as the darkest areas, creating a more absorbent and visually captivating image.
What Are the Benefits of HDR Photography?
The most notable advantage of HDR photography is it enables you to bring out more intricate details in both the highlights and shadows of your images, rendering a precise and more dynamic reproduction of a scene. In subjects that have a diverse range of luminosity, this feature can make a decisive difference.
Therefore, HDR photography is an effective way to create professional-looking images, especially if you’re shooting a subject that involves many bright and dark areas.
HDR photography is also helpful in creating a sense of depth and dimension. As a result, your photographs will be more immersive and engaging. When you capture several images at different exposures and blend them together, the final image will draw the viewer in, as it feels more three-dimensional.
HDR photography is an artistic tool that enables you to create striking images that are full of detail. This tool presents you with a level of creativity and flexibility that goes beyond the boundaries of traditional photography. It empowers you to express your artistic vision in distinctive ways, enabling you to create images with an unusual aesthetic.
The continued advancement of technology has made HDR photography accessible to photographers at all levels. Several digital camera models and smartphones have an automated HDR mode. The newer iPhone models capture photos in HDR by default.
HDR photography has thrown open a new realm of exploration, allowing photographers to try out different exposure levels, light mapping settings, and processing methods to create unique images.
The good news is that with the right photography equipment and a creative eye, it’s easy to explore the infinite possibilities that HDR photography offers. You can capture scenes in a way that accurately reflects the beauty and magnificence of the world around you.

Outsource Photo Editing Services
Picsera offers photo editing and retouching, so you can focus on your business instead. Spend a fraction of the cost, time, and effort of photography with Picsera. Click here to find out more.When to Use HDR Photography?
As already mentioned, HDR photography is used to capture sharp, better-looking images, especially in certain situations. While photography is definitely more than dazzling the viewer with colors, it’s best to use HDR photography when your camera cannot capture the full spectrum of dynamic range.
Even in the best conditions, it isn’t easy to capture all the details you desire in one shot. That’s the reason newer models of cameras and smartphones have an “auto-HDR” mode. That is, the device can sense whether it’s alright to shoot in HDR or not.
HDR techniques enlarge the dynamic range beyond what your camera can capture in a single exposure. Using these techniques, you can capture and improve detail across the whole luminance range. Therefore, HDR photography is suitable for any high-contrast scene.
HDR photography can be suitable for a wide range of situations. However, it’s simplest and most effective when there’s minimal or no movement in your scene and your camera is locked on a tripod.
Common Mistakes to Avoid with HDR Photography
Discussed here are some common mistakes in HDR photography and how to avoid them.
#1: HDR Presets
HDR presets are pre-configured sets of adjustments in HDR software that you can apply to images to create a High Dynamic Range (HDR) effect.
Presets are awesome because they enable you to transform an image from boring to breathtaking in one click. While this is an amazing feature, most HDR software comes with a whole set of dreadful presets. If you’re not careful, these preloaded presents can turn your final image into something that’s painful to view.
The best solution is to create your own presets.
#2: Using Low-Quality Bracketed Exposures
In HDR photography, bracketing involves shooting multiple images of the same scene at different exposure settings. These images are blended together to create a final HDR image. However, if the quality of the bracketed images is low, the final image will be unsatisfactory.
The best way to avoid making this mistake is to use high-quality bracketed images. Only then do you get a stunning final image. Use a tripod to ensure the camera is steady, and shoot in RAW format to capture maximum detail.
#3: Halo Effect
When an image is subjected to heavy HDR editing, a rim of light—known as halo—can appear in high-contrast areas. The main reason for the halo effect is over-manipulating the micro-contrast, lighting effect, shadow smoothing, etc.
An image is highly prone to the halo effect when you use software to edit HDR photos. The best way to avoid it is to move the adjustment sliders carefully. Never move all of them to the far end. Keep an eye on the image as you move the sliders. When you are satisfied with the image quality, save your file and exit.
Check the image after some time with fresh eyes. If you see halo, adjust the contrast to remove it.
#4: Incorrect Color Balance
When the color balance in an image is incorrect, it will appear too warm or too cool. The colors may also not be accurate.
You can avoid this mistake by noting the color temperature of the scene and adjusting the white balance accordingly. In addition, you can ensure that the images you shoot are balanced and visually appealing by adjusting the vibrancy and color saturation settings.
#5: Cloud Movement
Clouds tend to have hard edges and are easily noticeable in the final HDR image. As you capture your shots, clouds continue to move. Due to this movement, the final image merge can show duplicate clouds that look unnatural. As a result, you’ll see blurred cloud movement on the skyline that appears to be out of place.
Clouds move faster when it’s windy. So, avoid capturing your shots in windy conditions. Since the goal of HDR photography is to create a natural image, take care not to create one that’s noticeably unrealistic.
Common HDR Photography Applications and Use Cases
HDR photography is a highly functional technique for professional photographers in various niches. They can leverage this technique to capture images with a vast dynamic range, ensuring a balanced representation of light and shadow.
Since HDR photography emphasizes the subtle details of highlights and shadows, it’s used extensively in the following four niches:
- Real estate
- Landscape
- Creating Abstract Art and Special Effects
- Astrophotography
All four use cases include high-contrast scenes, restricting what you can shoot in a single image.
1. Real Estate HDR Photography
When shooting images of properties, photographers will typically encounter unfavorable lighting situations, such as harsh sunlight coming through windows or dim, poorly lit areas in interior spaces. Obviously, a single shot cannot address these challenges.
The multiple-shot approach of HDR photography can create images with a more balanced rendering of bright spots and dark shadows, making certain the property’s unique features are showcased in their best light.
Highlight the Distinctive Features of a Property
When you capture exterior architectural shots, the common elements you deal with include dark buildings and sunny skies. Even in interior photography, you’ll come across well-lit areas and dark shadows.
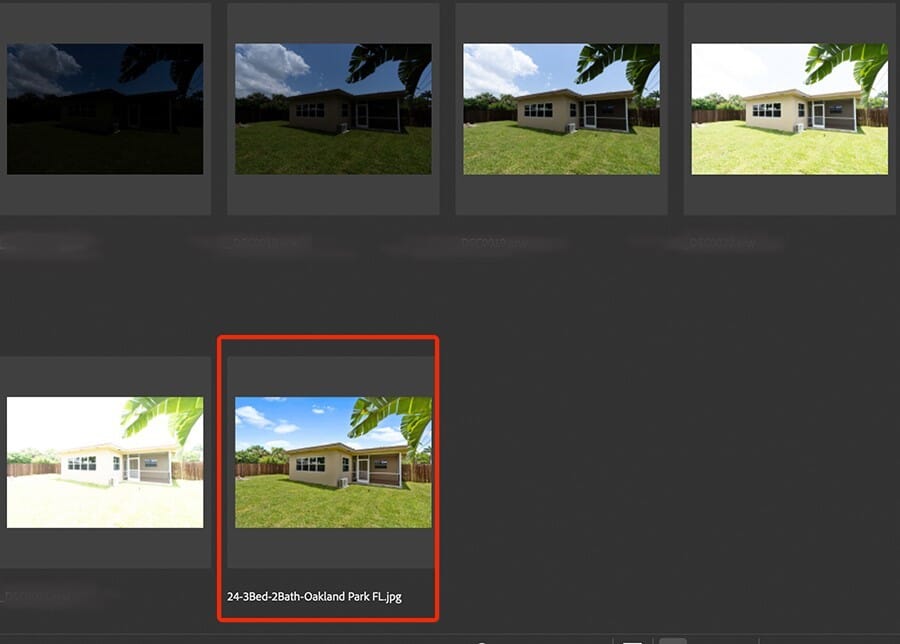
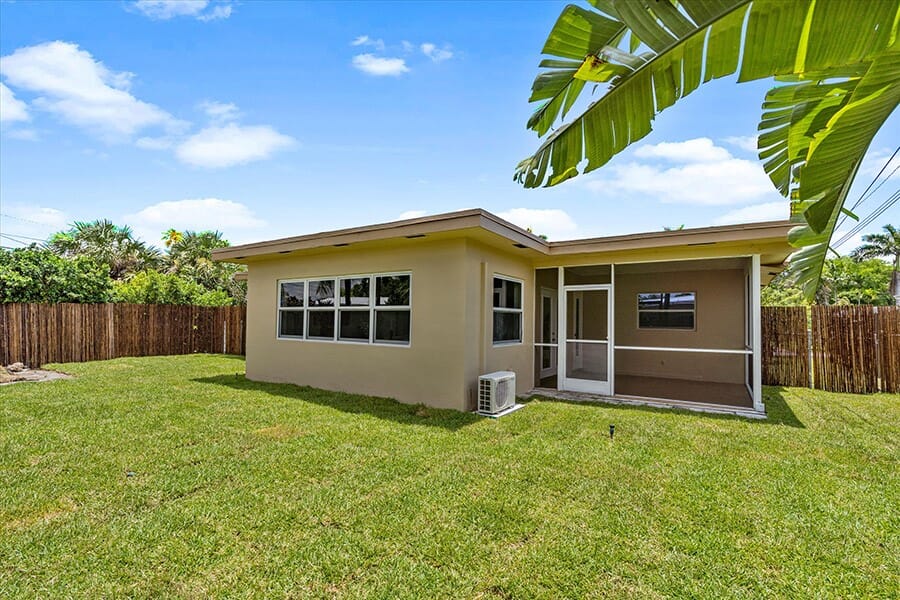
The building in the image below was shot at 12:00 pm on a summer day in Miami. In order to capture the full range of tones and create some depth in the image, the photographer was forced to shoot a bracket and create an HDR.
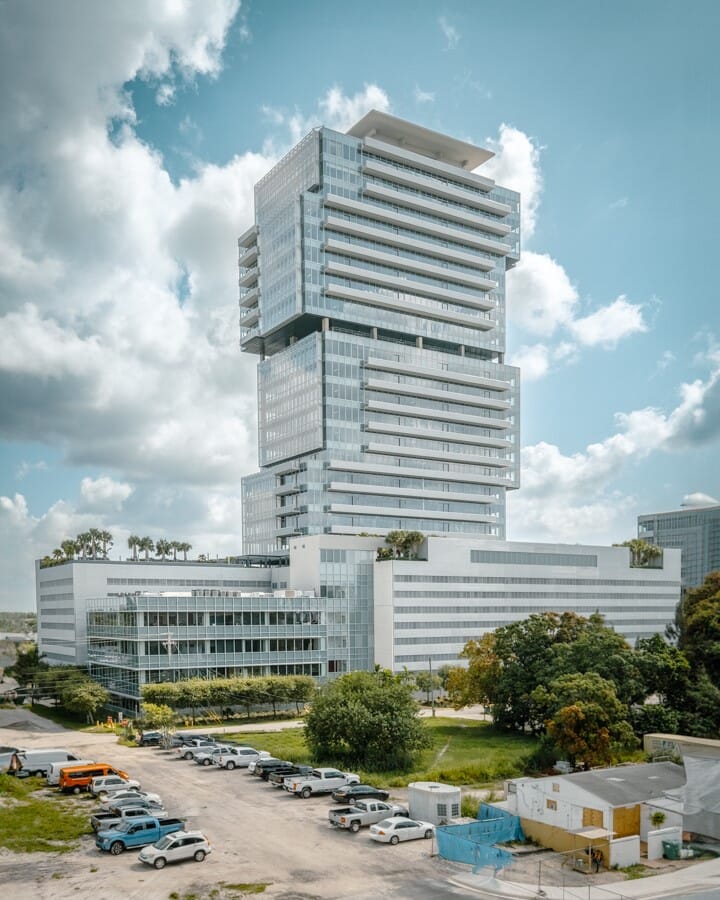
HDR photography will highlight the right selling points of a property, ensuring your images stand out from the rest.
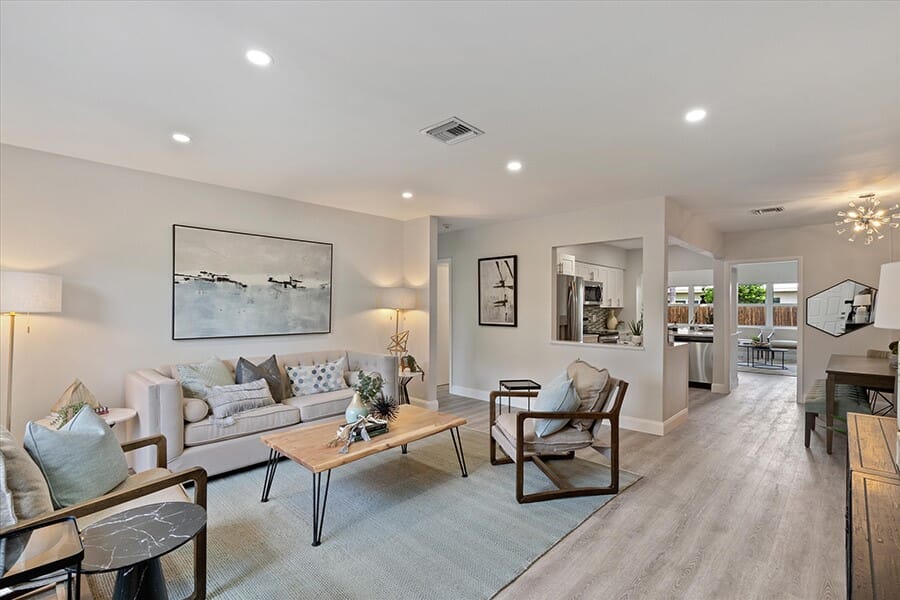

Each property has its own distinctive features. It could be a spacious living room, the granite countertop in the kitchen, an ultra-modern bathroom, or a well looked-after garden.
HDR photography emphasizes these selling points and presents real estate agents and property owners with a better chance of selling. The photo editors can fine-tune the images and highlight the best parts. For example, they may do tile masking, a technique to remove reflections on kitchen tiles.
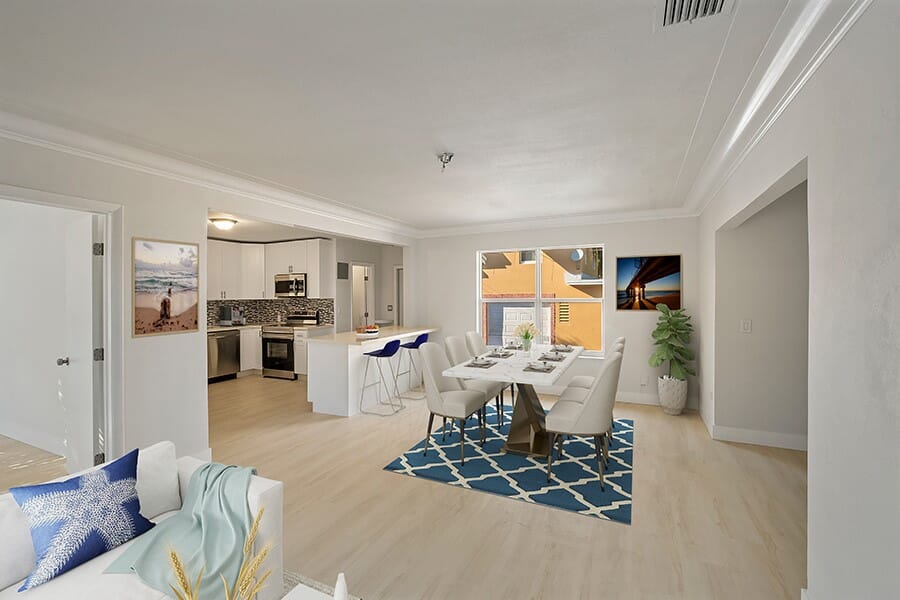
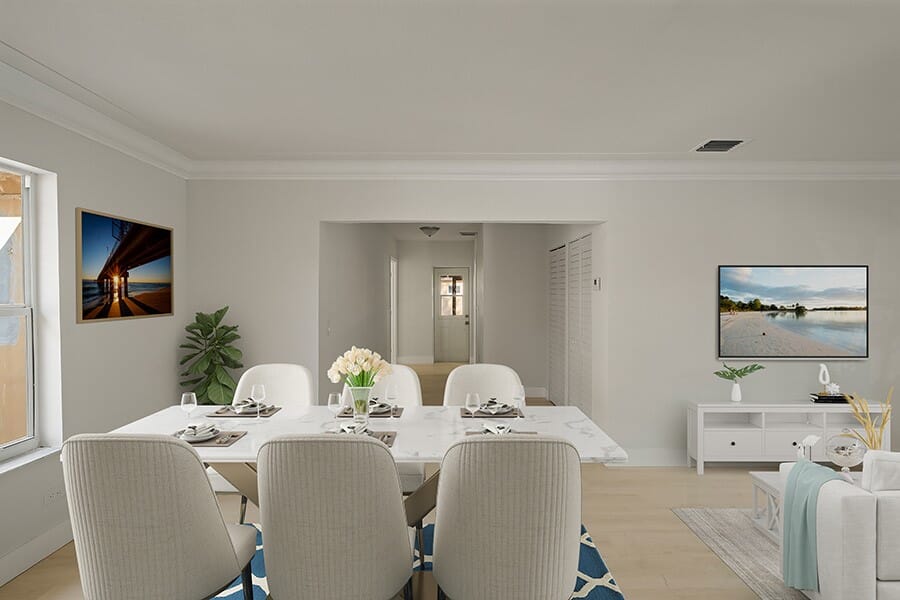
With HDR images, it’s really not as simple as letting the software create the merged files. The post-production processing is much more complex. Complicated Photoshop editing (described in detail below) and a lot of fine-tuning the image are necessary after the software creates the merge. As already mentioned, white balance issues and halo effects also need to be corrected manually.
Hence, you can’t rely on the automated software to fine-tune your bracketed images. The good news is that you can outsource your HDR brackets to Picsera to manually merge the frames using Photoshop and dial in the desired tones.
2. Landscape HDR Photography
Landscape photography includes different environments, such as forests, rock formations, and seascapes. HDR photography can help you in capturing images of vast and complex landscapes, where different parts may require a slightly different exposure. This technique is especially useful in cases of sunrise and sunset photographs and brightly illuminated scenes.
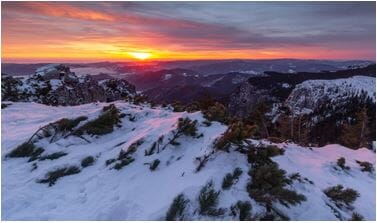

The example above on the left shows 1 of the frames of the bracket that was used to create the image on the right. The day was cloudy but the light in the distant mountains was much greater than the light in the foreground. So, I shot a bracket and was able to add more color in the foreground and more detail in the background.
HDR photography is a great way to shoot both the sky and the foreground elements in their full splendor. You could capture multiple images of the same scene at different exposure settings and merge them together using software, ensuring the best parts of each image are preserved. Hence, the advantage of using HDR in landscape photography is that in the final image, you’ll have more contrast, color, and detail than any single exposure.

When you photograph landscapes, you’ll typically deal with bright skies and dim foregrounds. For instance, in a big landscape photograph, there’s plenty of contrast between the sky and the land. Your camera will find it difficult to deal with this huge contrast in just one shot. But with HDR, it’s possible to capture the detail of the sky without making the land in the foreground appear too dark, and vice-versa. That is, the foreground can be brightened up without altering the well-lit sections of your photo.
Since stationary subjects are quite likely to be overexposed or underexposed in different areas, HDR photography is especially advantageous for capturing photos during sunrise or sunset. It can be used to shoot in the night, as well.
While HDR isn’t the universal answer, it’s an effective tool for landscape photography, especially for scenes involving a high dynamic range. For example, sunrises and sunsets typically have a sky many times brighter than the land or water.
The sun can also create intense shadows and highlights in forests and mountains. Rivers and waterfalls often restrict glare due to the reflection of light off the water. Even in urban landscapes, sunrays will reflect off buildings.
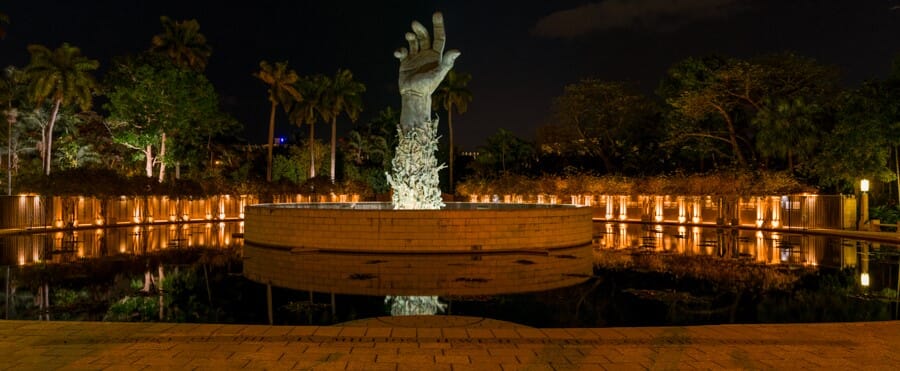
HDR plays a vital role in landscape photography, as it can capture more color and detail in both bright and dark parts of the image. Thus, a more balanced and realistic depiction of the scene can be created. In addition, HDR photography can reveal subtle tones and textures, enhancing the overall atmosphere of the landscape.
3. Creating Abstract Art and Special Effects
Creating Abstract Art Using HDR Photography
Abstract art photography focuses on the beauty of colors, patterns, textures, and shapes. Unlike other photography genres, its objective is not to portray reality in a literal sense. Abstract art is more about blending visual elements to create photographs that might not be recognizable straightaway.
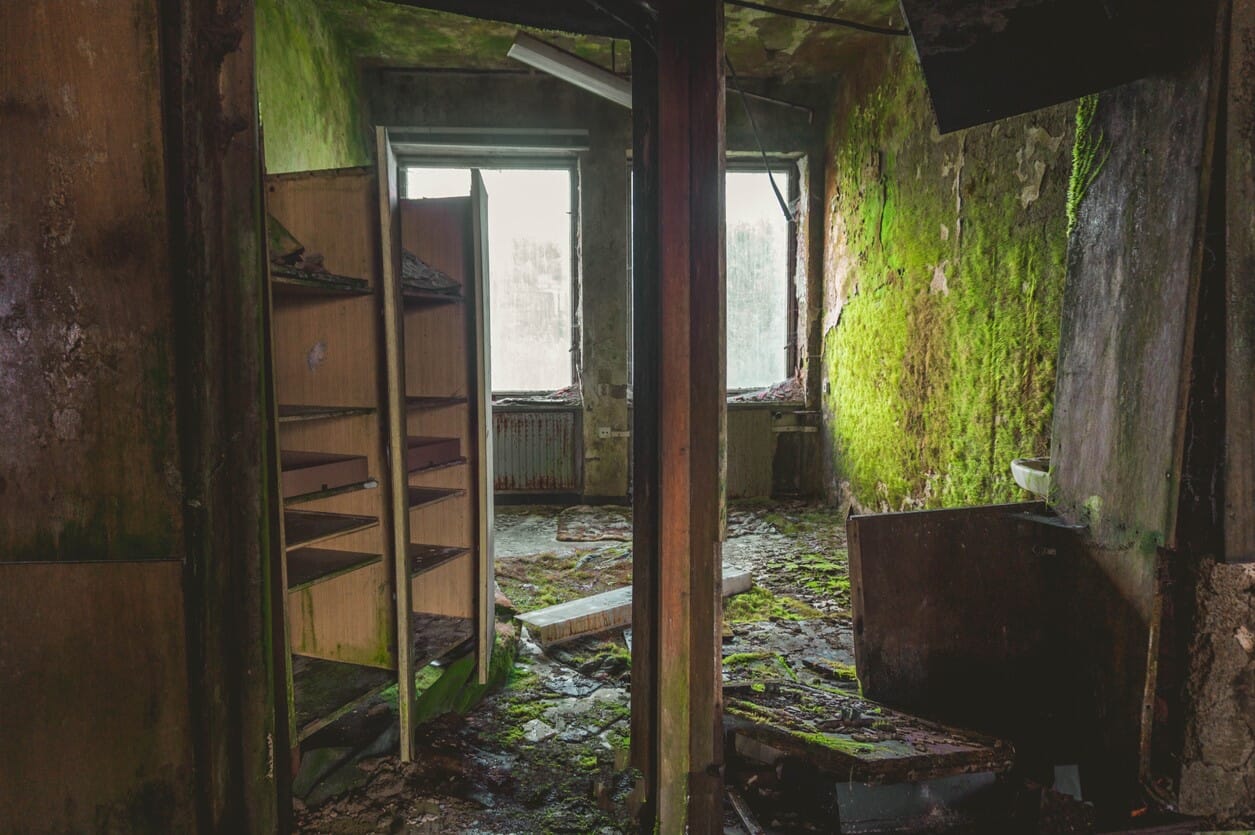
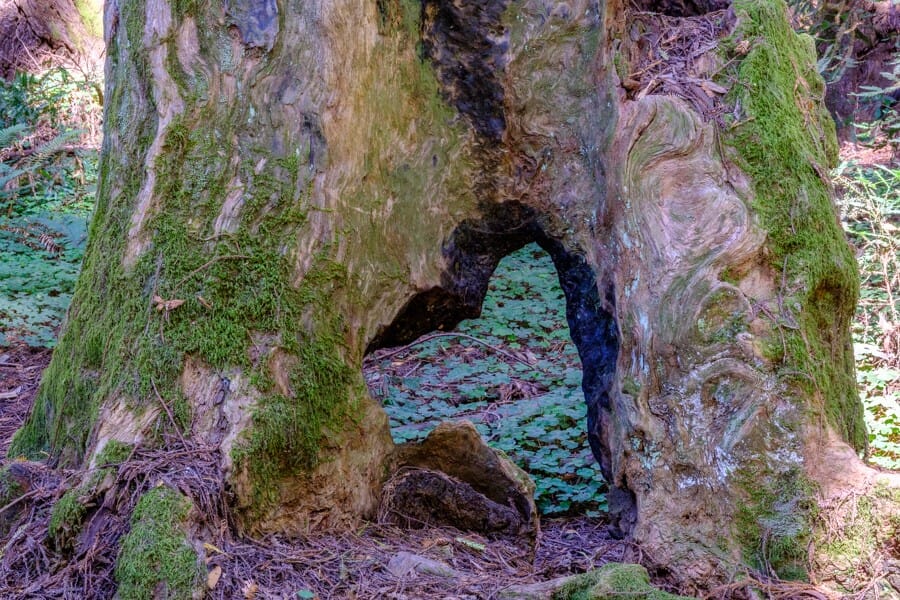
Using HDR, we can capture a lot more detail. This comes in handy when you are trying to emphasize texture like in the examples shown here.
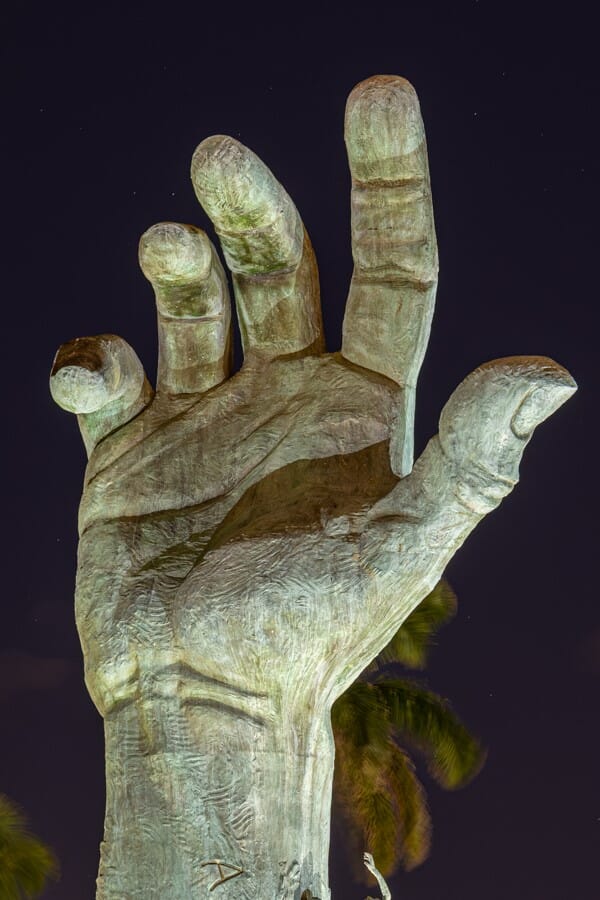

Imagine a close-up shot of the interior of a crumbling house. The subject might not be obvious at first glance. However, the unique patterns, the vivid colors, and the characteristic textures can create a fascinating image. The viewer will need to take a closer look, explore and interpret the image.
The easiest way to understand the concept of abstract art is to examine the works of visual artist Bryan Graf and fine art photographer Pedro Correa. The primary advantage of using HDR photography in abstract art is that it permits you to explore your creative side and try out different ideas. For instance, you can transform vivid landscapes into color blocks.
Creating Special Effects Using HDR Photography
Special effects can make your images stand out. The four essential elements of trick photography are a subject, a light source, a camera, and a tripod.
The aperture, the shutter speed, and the ISO are all connected. You need to strike the perfect balance with these three factors to eliminate noise. You also need a sound understanding of the principles of visual effects and composition. Only then will the images with special effects be clear and satisfactory.
As you can see in the image below, HDR enables us to create richer and deeper colors. So, when you are trying to make an impact with colors (or emphasize colors in the image), you can shoot a bracket and create an HDR image.
4. Astrophotography
Astrophotography relates to capturing images of the night sky or celestial bodies such as stars, comets, asteroids, planets, etc. This niche also relates to taking images of the moon, the Milky Way galaxy, or other deep space objects. The image below is stack of 52 HDR frames.
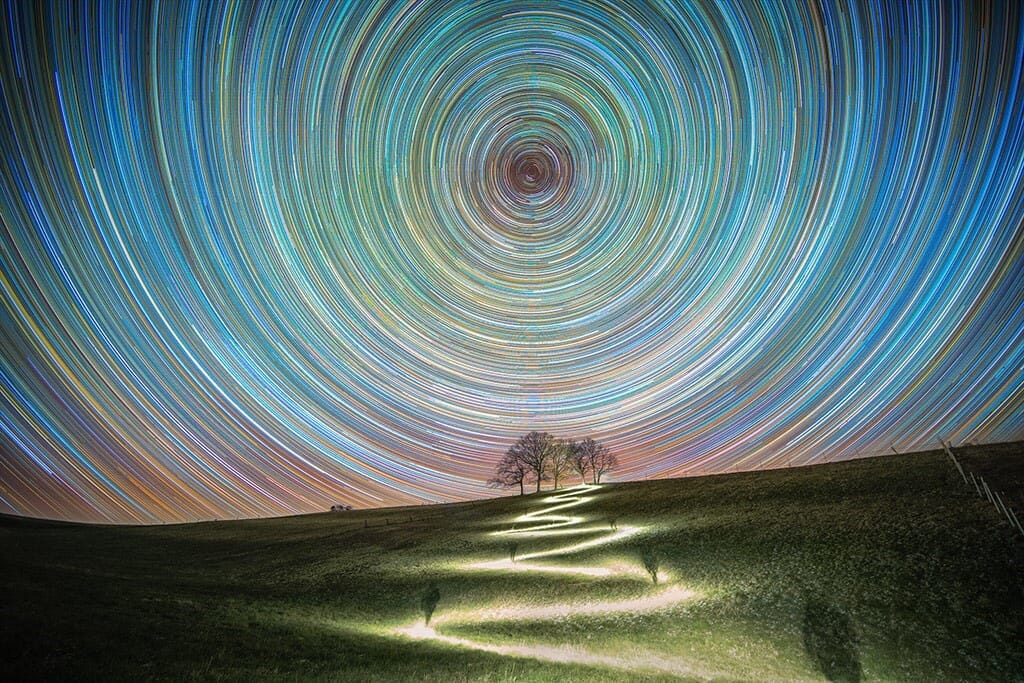
Contrary to popular belief, you don’t need astronomically priced lenses, high-end professional cameras, and complicated image-stacking software to get started. Inexpensive wide-angle lenses are capable of capturing images of the night sky.
Taking Pictures of the Moon in Conjunction with a Foreground Scene
You need to consider several points when you capture wide-field lunar photos that also include a foreground scene. You must mount the camera on a firm tripod to ensure it doesn’t wobble and allows accurate framing of the scene.
Composition is a decisive factor in getting exceptional results. Therefore, traveling to the countryside can be worthwhile if you live in a city location.
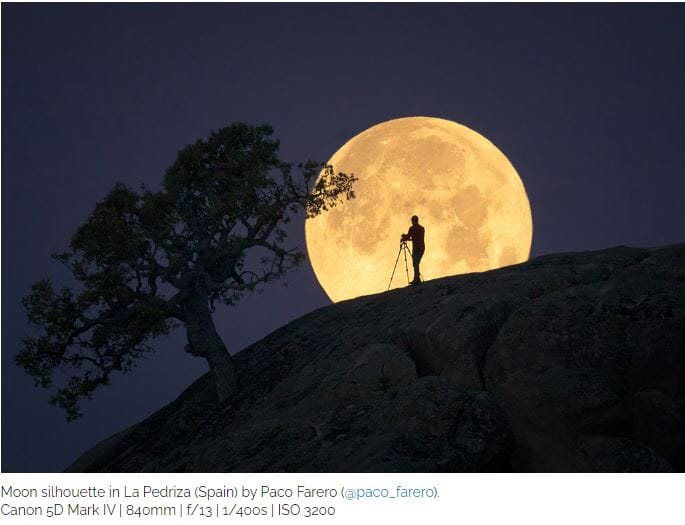
Considering that the moon is a bright celestial object, you’ll need to shoot at a low ISO of 100–400 to limit noise to a minimum. To eliminate camera shake when capturing the shots, use the camera self-timer or a remote cable release.
You know that the image above must be an HDR, as you can see details in the moon and also the details in the foreground.
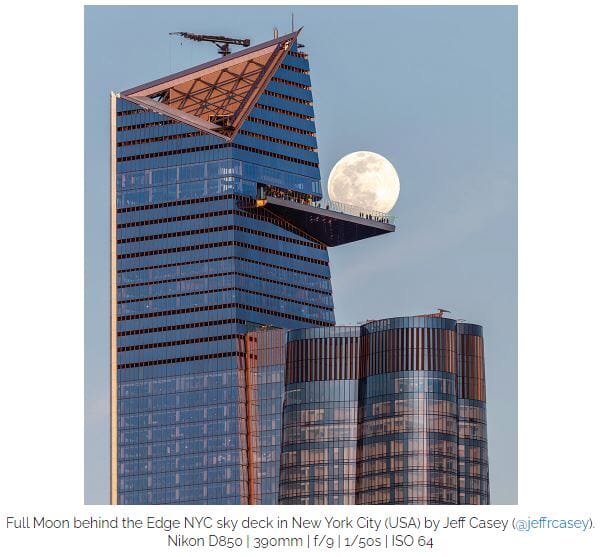
Focus the scene carefully. Autofocus typically works well on the moon. However, if it’s struggling, change to manual focusing using live view. Zoom in on the screen and ensure the detail is sharp. Depending on the lighting conditions, exposure times will vary. You can get a well-balanced shot between f/6.5 to f/9.
Again, in the image above, you can see details in the moon and the foreground.
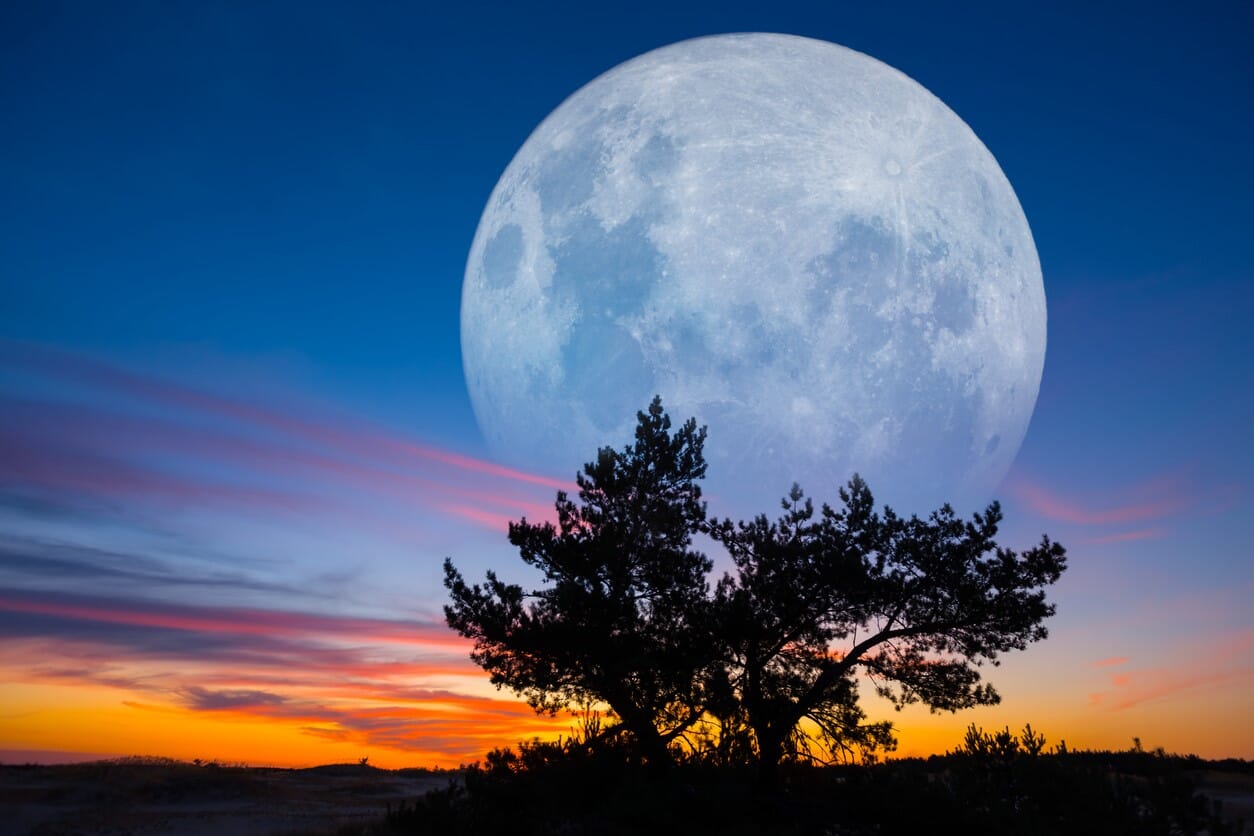
The image above is a great example of an HDR.
The best times to capture the details of the moon as well as the details in the foreground landscape are during sunset and sunrise, especially during a crescent moon in the twilight sky, or when it is in the proximity of one of the brighter planets. The most striking images are produced during moonrise and moonset, with the lunar landscape presented against a foreground scene.
How to Create HDR Images
Capturing the Frames
Capturing the frames is vital to create an HDR image.
In HDR photography, you need to shoot multiple frames of the same scene. These frames will be merged together later into one final image. Since you will shoot the same scene repeatedly, the camera must be held steady in a fixed position. So, it’s best to use a tripod and set the camera in the lock position.
As already mentioned, a standard HDR photograph comprises one frame that is 2 stops underexposed (too dark), one frame that is exposed normally, and one frame that is 2 stops overexposed (too bright). This is a bracketed set (−2, 0, +2).
A bracket refers to the number of individual frames of an HDR image. An HDR photograph comprises an odd number of frames varying from 3 to 9 individual images. That is, you can capture more images if you desire, such as (−4, −2, 0, +2, +4), (−3, −2, −1, 0, +1, +2, +3), or a (−4, −3, −2, −1, 0, +1, +2, +3, +4).
You can determine beforehand the number of frames you want in a bracket. For instance, you can capture 3 or 5 frames for high contrast scenes and 5, 7, or 9 frames for low contrast scenes.
Capture a well-exposed frame of the subject first, as it will function as the baseline of your HDR image. Next, you can capture the underexposed frame/s and overexposed frame/s. The underexposed frames capture details lost in the highlights, and the overexposed frames capture details lost in the shadows.
You’ll need to adjust the aperture and ISO settings appropriately for your subject if you’re shooting in manual mode.
Merging HDR Images Using Software
After capturing all the bracketed frames, save each set in separate folders on your hard drive. It will keep your images organized and improve your workflow. You have several HDR software options to choose from to merge the frames into one final image. Two of the best options are discussed here.
1. Fully Automated in Adobe Lightroom
It’s easy to merge bracketed photos using Lightroom.
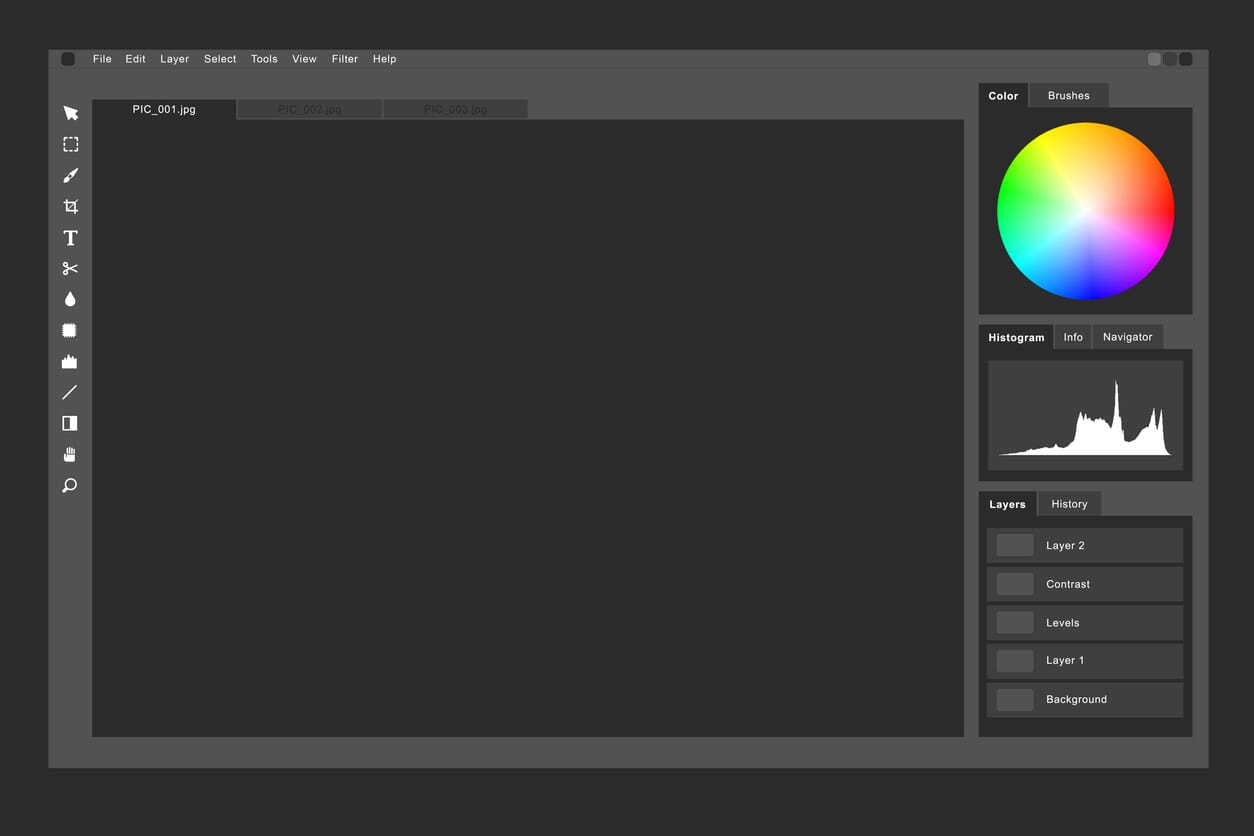
Open Lightroom and click on the Import option on the bottom left. Select the bracketed frames (3, 5, 7, or 9) you want to merge from the image library on your hard disk.
Once the selected frames show up, go to Photo on the taskbar at the top. Then, in the dropdown menu, click on Photo Merge and select HDR.
An HDR Merge Preview window will show up on the dashboard. Wait for a few seconds as the HDR preview image is created.
Once the HDR preview is complete, click on the Merge button.
The final HDR photo will be saved and ready in quick time. This Lightroom feature is automatic and will take less than 10 seconds, depending on the number of frames you have selected.
2. Manually Merging Exposures Using Adobe Photoshop Layers
The following are the advantages of using Adobe Photoshop Layers over the automatic merge feature in Adobe Lightroom:
- Precision and Control: Manual exposure blending in Photoshop gives you precise control over how different exposures are blended together. You can carefully select which areas of each exposure to incorporate into the final image, allowing for more nuanced adjustments and ensuring a natural-looking result.
- Artistic Vision: Manual blending allows you to express your artistic vision more fully. You can selectively blend highlights, shadows, and mid-tones to create a visually striking image that matches your creative intent. This level of control is often difficult to achieve with automated software.
- Avoiding Halo and Artifacts: Automated HDR software can sometimes introduce halos or artifacts around high-contrast edges, especially when processing extreme HDR scenes. Manual blending in Photoshop lets you carefully blend exposures while avoiding these unwanted artifacts, resulting in a cleaner and more professional-looking final image.
- Customizable Workflow: Photoshop offers a wide range of tools and techniques for blending exposures, including layer masks, luminosity masks, and blending modes. This flexibility allows you to tailor your workflow to the specific needs of each image, ensuring optimal results for different scenes and lighting conditions.
- Learning and Skill Development: Manual exposure blending requires a deeper understanding of image editing techniques and exposure adjustments. By mastering manual blending in Photoshop, you’ll develop valuable skills that can be applied to a variety of photographic styles and post-processing workflows.
- Optimized for Complex Scenes: For challenging HDR scenes with extreme dynamic range, manual blending can often produce better results than automated software. You can carefully blend multiple exposures to preserve details in highlights and shadows while maintaining a natural tonal balance throughout the image.

The comparison above shows an automated HDR using Lightroom (on the left) and manual exposure blending Photoshop layers (on the right). Note the following benefits of the manually blended image in Photoshop:
- Better color balance
- More detail in the shadows
- More aesthetically pleasing sky.
3. Capturing HDR Images on iPhone Is Easy and Happens Automatically
iPhone captures several shots in quick succession at different exposures and merges them together. The final photograph brings out more highlight and shadow detail. By default, iPhone captures photographs in HDR (for the front and rear cameras). However, the HDR feature can be controlled manually on some models.
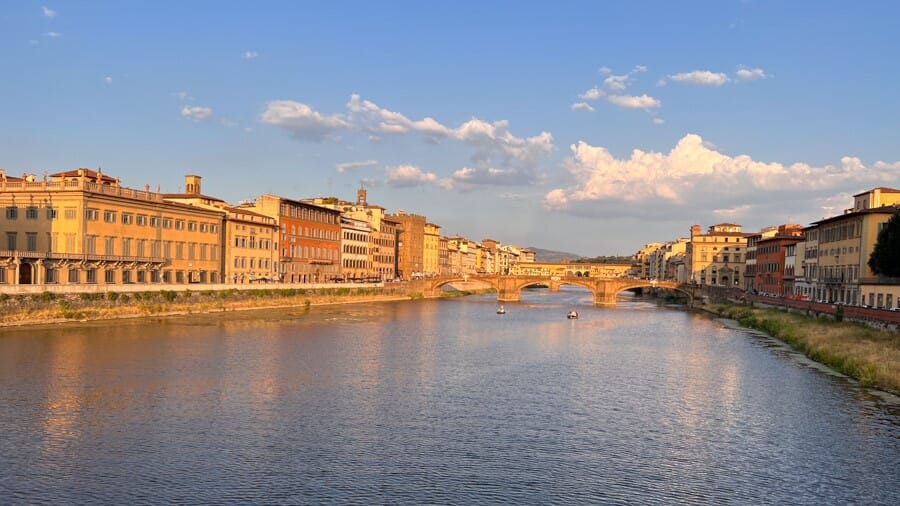
The newer iPhone models automatically take bracketed exposures when the iPhone camera detects that the tonal range is too wide for everything to fit within 1 image. The phone shoots a bracket and then automatically merges all of the frames to create an HDR without the photographer even realizing it. The image below was taken using an iPhone.
Why HDR Photography Isn’t Always Needed?
In many situations, especially in scenes with a lot of variation in highlights and shadows, HDR has its advantages. But HDR photography isn’t always needed.
Discussed here are three reasons why HDR photography isn’t always needed.
1. Camera Sensors Have Larger Dynamic Range Capabilities Than 5 to 10 Years Ago

Over the past 10 years, digital cameras have improved significantly. The key advancements include faster autofocus systems, higher resolution sensors, and improved low-light performance.
Sensor size is of prime importance in photography, influencing image quality more than generally thought. A bigger sensor captures better images, as it takes in more light compared to a small one, which, in turn, produces better-looking images.
Sensor advancement has been phenomenal in recent years with the constantly growing capability of parallel components keeping pace. Therefore, it’s vital to consider the sensor size when you buy a camera. The camera technology and lens quality are two other important factors to consider.
A large-sensor camera has a higher dynamic range and will produce a better image resolution, color accuracy, lens sharpness, ISO performance, and bit depth.
2. Medium Format Camera Sensors Can Hold a Very Large Dynamic Range
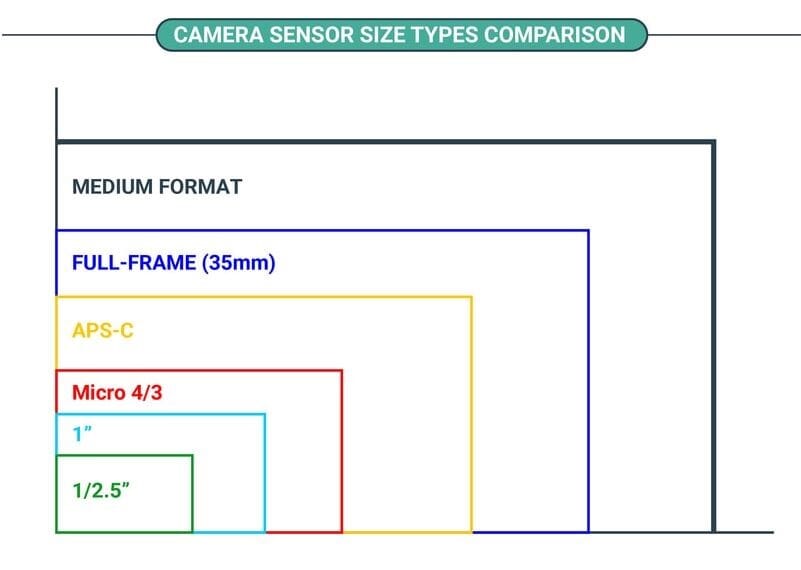
From the image above, it’s obvious that a medium format camera is the best choice if you are looking for the maximum dynamic range and resolution. Larger sensors with larger pixels not only offer a wider dynamic range but also preserve more details, ensuring little is lost in shadows and highlights.
With a medium format camera, you can capture more detail and tonality than with a camera that has a smaller sensor. Hence, medium format is perfect for professional applications such as real estate, landscape, fine art, and portrait photography. These cameras also produce breathtaking prints at large sizes without loss of quality or sharpness.
3. Sometimes, an Image Is More Appealing and More Realistic Without an Exaggerated Dynamic Range
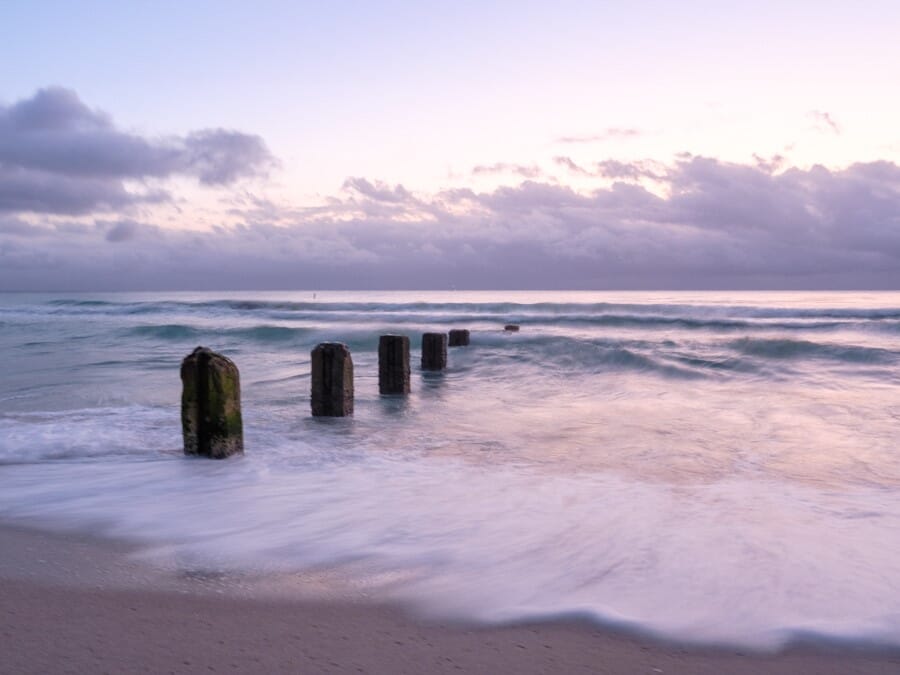
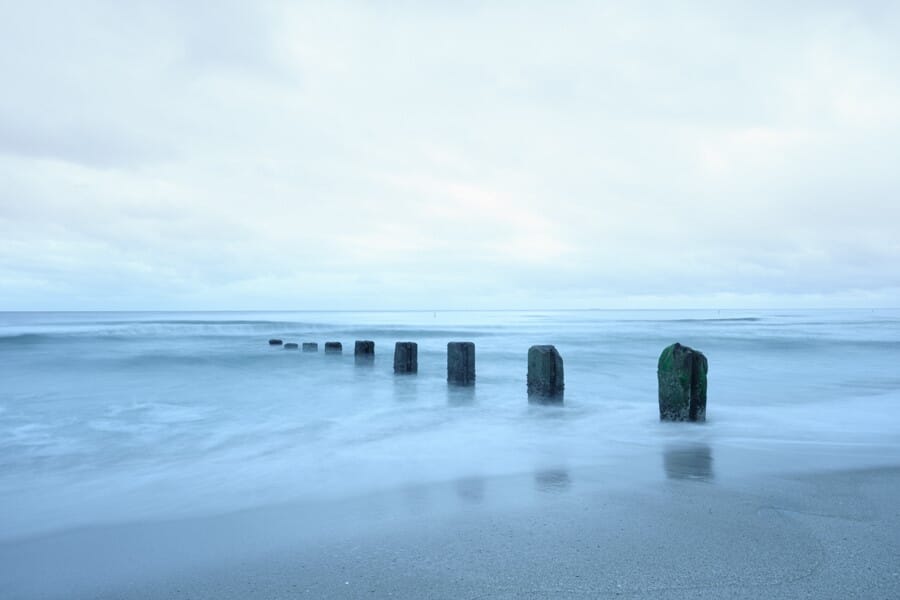
HDR isn’t always necessary. Sometimes, photographers will shoot a bracket with the intention of creating an HDR image and then decide that they need only 1 of the frames to create the mood of the image they are aiming for. Shown below are two examples of images that aren’t HDR. They were just 1 frame within the bracket.
Conclusion
The noticeable advantage of HDR photography over traditional photography is it brings out improved details in highlights as well as shadows, rendering a more precise and dynamic replication of a scene. At the most elementary level, an HDR photograph is three (or five, seven, or nine) frames taken at different exposure levels and then merged together with HDR software to create a better picture.

Picsera was founded in 2014 by David Sinai, a serious ameteur photographer who spent the first 20 years of his career working in the financial technology space. With a track record of building innovative solutions and working with offshore partners, David started Picsera to help photographers work more efficiently by enabling them to outsource their image editing. With very affordable rates and incredibly fast turnaround times, photographers from a variety of industries (eCommerce, real estate, weddings and portrait studios) enjoy larger, more successful businesses while still maintaining more time for their families, friends, and hobbies. Today, David and his team at Picsera assist all kinds of content creators with 3D modeling and rendering and video editing. When David is not working you’ll find him spending time with his family, mountain biking, or capturing landscapes throughout South Florida with either his pro cameras or drone.


