Photo Editing is important for both DIY and Professional Product Photographers
Product photos on your site influence your sales either positively or negatively depending on their quality. Blogs of many eCommerce platforms such as Shopify, WooCommerce, Big Commerce, Volusion, and Lemonstand highlight the topic of product photography and offer photography tips that they’ve seen lead to higher conversions. Some even offer useful do-it-yourself (DIY) guides for taking your own product photos.
One of the biggest choices is whether to do it yourself or to hire a professional. Professional experience, equipment, and photo editing greatly increase the quality of your product photos. However, when you are just getting started, hiring a professional is often not in your budget.
Whether you are a professional photographer or a do-it-yourselfer, photo editing services like Picsera’s can cost-effectively improve the quality of photos on your eCommerce site. Clipping paths, white background, image retouching, color correction, masking, transformation, and adding or removing objects are all steps that you’ll need to take with each of your product photos.
Photo editing is a time-consuming process. That’s time better spent on optimizing your user experience or shopping cart if you’re a do-it-yourselfer. Or, if you are a professional photographer, your time may be better spent on the next photo shoot.
From our perspective in providing photo editing services, pre-production and file type are the two most important photographic considerations for both professional and DIY photographers alike.
Pre-Production
Product photographers need to spend time cleaning objects before a shoot. Microfiber cloths and tape lint rollers are useful to have on hand during a photo shoot.
In fact, clean and simple is preferred for eCommerce product shoots. Setting up the shoot may include gathering tables and stands, using seamless white backgrounds, and setting up lighting and tripods.
Overall composition considerations depend on the products involved. You may decide to arrange individual, group, detail, or component shots or use various compositions. For those who need a little extra help with their compositions, Picsera even offers composite creations through our custom services.
JPEG vs. RAW
Product photographers can speed up their workflow and shoot in jpeg because they have the benefit of shooting in a controlled environment allowing for correct and consistent exposures and white balance.
Also, in product photography images will end up at 72 DPI on the web. Smaller files (jpegs) are better for optimal user experience and faster download times.
While in product photography, you do not need to shoot in RAW to “capture the moment”, in certain cases (such as in jewelry and real estate photography) you may still need to shoot in RAW for some of the more complex editings that is needed.
Ask yourself these two questions to know if you need to use JPEG or RAW:

- Is the lighting controlled?
- Does the JPG capture enough detail for the level of editing required?
If the answer to either of these questions is no, it is best to stick with RAW. If yes, stick with JPEG.
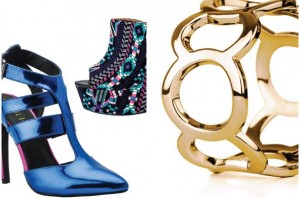
Many of Picsera customers are eCommerce businesses that rely heavily on product photography to boost sales. Our clients include shoe, jewelry, and other product retailers as well as professional product photographers.
Additional resources on the importance of high-quality images in increasing website conversions:
http://www.volusion.com/ecommerce-blog/articles/product-image-importance/
http://www.shopify.com/blog/4468702-is-your-awful-product-photography-losing-you-sales


