As a serious amateur photographer and as a real estate investor who takes pictures of each of my properties for marketing purposes, I’ve made it my mission to learn the best techniques for real estate photography. In this article, I will walk you through two of my South Florida properties and share images I’ve shot using both the Flambient workflow as well as straight HDR with no flash.
As the founder of Picsera Inc., a company that offers an assortment of image editing services, the knowledge I’ve acquired by studying Flambient has empowered me to help thousands of real estate photographers take better pictures and command higher prices for their services. My goal is to help you do the same.
This article focuses on giving you, an aspiring real estate and commercial architecture photographer, a solid introduction to Flambient. At the end of this article, I provide you with links to websites and YouTube channels that offer comprehensive courses on Flambient Real Estate Photography.
What Is Flambient Photography for Real Estate and Architecture?
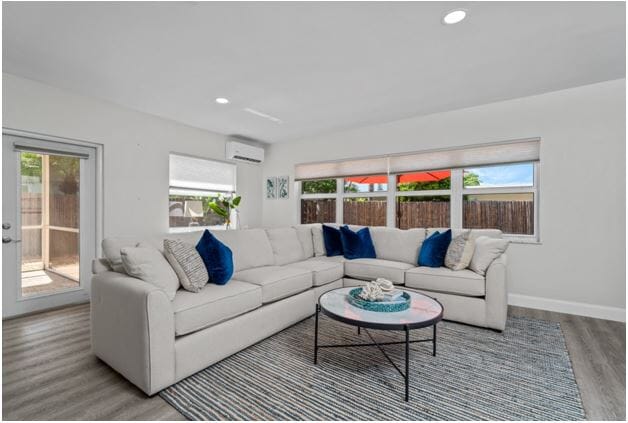
The term Flambient comes from Flash and Ambient.
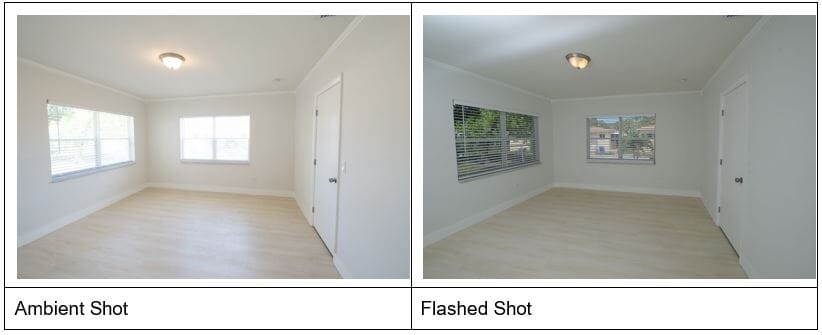
Flambient photography is the process of blending two or more images of a space with the goal of creating high-quality real estate or architectural photographs. At least one of the images is captured with only ambient light and the other image is captured with a flash or some type of artificial light with no ambient light included in the image.
The exposure captured with only ambient light provides the natural luminosity—it captures the natural shadows, mood, and overall lighting of the space. The flashed exposure captures the accurate colors in walls, flooring, and furniture.
Blending a flashed and ambient-lit image in software such as Adobe Photoshop is the fastest and easiest way to create high-quality real estate and architectural images.
What Are the Key Benefits of Flambient Photography?
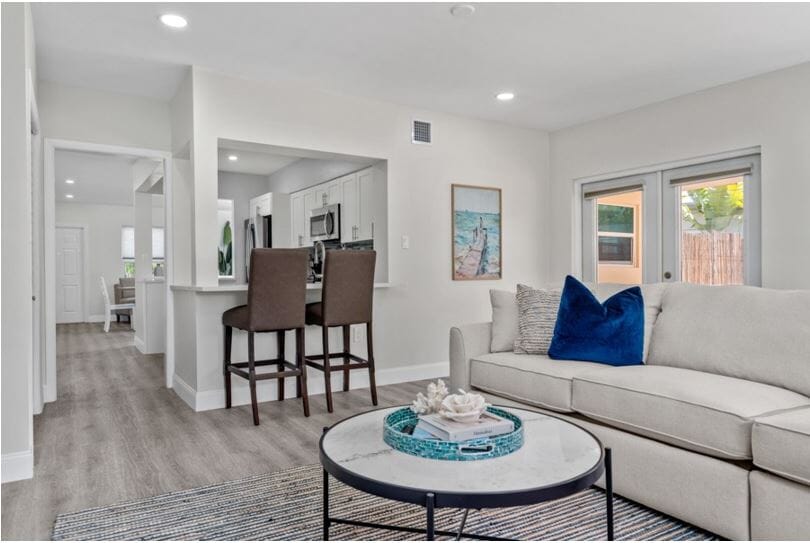
- Enhanced Details: The use of flash ensures that all details in the scene are well-lit and sharp. Artificial lighting increases contrast, which, in turn, enables the images to appear sharp.
- Natural Look: By combining flash with ambient light, you can maintain the natural look and feel of the space. If no ambient-only images are used to create the final image, then an image with only flash will appear cold and unrealistic. Again, when we ignore the color from the ambient exposure and only use it for luminosity, then we can create a very natural and realistic composite.
- Reduced Color Casts: Flash helps to neutralize color casts from other light sources that may be present in the space, resulting in more accurate colors. While it’s possible to get accurate colors from an ambient-only exposure, the colors are never 100 percent accurate. And, it usually takes more time in post-production adjusting white balance, hue, and saturation in order to make the colors appear accurate and closer to true-to-life.
- Controlled Shadows: Proper blending of flash and ambient exposures can control and soften shadows, creating a more visually appealing image. By adding artificial lighting in darker areas of a scene, we can reduce harsh shadows in the camera without having to resort to lifting shadows in post-production. Lifting shadows in the editing process amplifies the appearance of noise within images.
- Cleaner, Less Noise in Images: Using an external lighting source also permits the use of lower ISOs when capturing images. The higher the ISO, the more noise will be visible within the image.
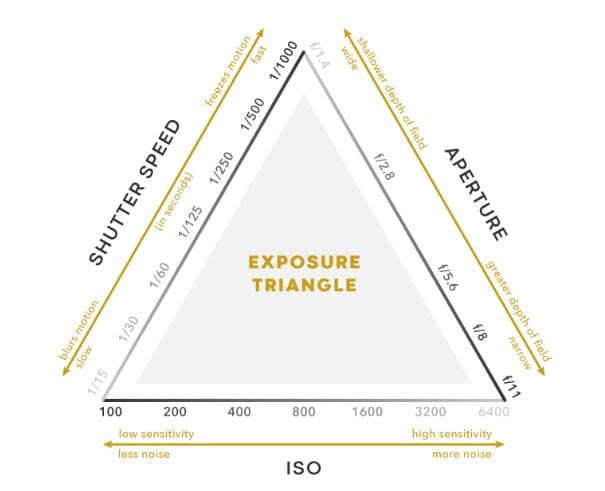
While exposure triangle is one term, it comprises three variables—ISO, shutter speed, and aperture. When you look at the image above, it’s obvious that higher ISOs make sensors more sensitive to the available light, but this comes at the cost of introducing more noise in the image. Therefore, the best practice for real estate and architecture photography is to use the camera’s native ISO, which is typically around ISO 100 (full-frame cameras like Nikon or Canon) or ISO 200 for crop sensor cameras from Fuji.) Shooting at the camera’s native ISO will result in the cleanest images the camera is able to capture.
(The exposure triangle is explained in great detail in our blog post 7 Key Tips to Create Amazing Clothing Photography for Ecommerce and Product Catalogs under Tip #4: Shoot at the Lowest ISO Possible to Eliminate Noise.)
- Accurate Window Shots with Minimal Time Editing Images. It’s typically very difficult to obtain a nice image of the exterior of a window when shooting from the inside of a room due to the difference in dynamic range between the interior space and the outside. So, it’s common for photographers to shoot a bracket of ambient-only images, allowing them to get a nice exposure of the inside and a nice exposure of the outside. But the process of blending the exterior portion of the windows is a time-intensive editing process. The Flambient way of shooting a window is to point a flash directly at the window frame and then blend the window shot in Photoshop with the other two captures (ambient shot + flash shot) using the Darken layer blending mode. By using this approach, there’s no need to manually mask the window frames in order to allow only the window areas into the primary composite. We’ll take a deeper look at how to capture windows in the How To section on doing Flambient Real Estate photography later in this article.
- Fast Editing Workflow. A basic Flambient editing workflow in Photoshop is actually a lot easier than you might think. To start, you will only need to capture a minimum of 2 exposures, one with a flash and the other without, and this will get you a professional-looking image. By using special layer blending modes in Photoshop, you won’t need to do a lot of manual masking to blend the exposures (individual captures) in Photoshop. See the section entitled How to Edit Flambient Real Estate Photography I cover later in this post, for more specifics.
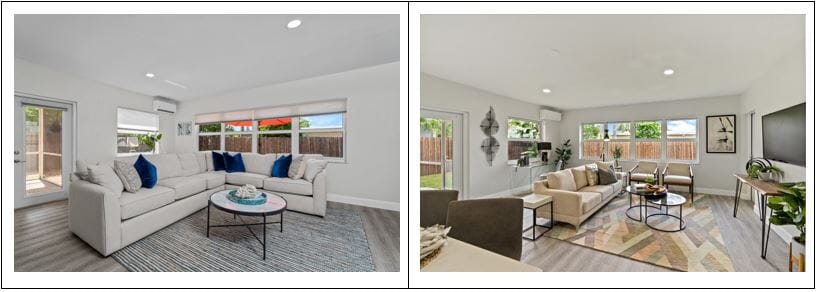
Flambient example is on the left above. The room colors appear more neutral and the colors of the floor and wall paint are more accurate than the image on the right that was shot using a bracket of 7 non-flashed images, standard HDR real estate photography.
What Type of Camera Gear Is Needed for Flambient Real Estate Photography?
Cameras
Mirrorless or full-frame DSLR cameras are popular choices. While full-frame sensors are preferred, crop sensors are very capable as well.
The right combination of camera and lens is indispensable for successful flambient photography. The best option that provides versatility and sharpness is a camera with manual settings paired with a lens that allows greater control over depth of field.
(With 28 lens recommendations, our detailed blog post, The Ultimate Guide to Finding the Best Lens for Real Estate Photography: A Comprehensive Look at What You Need to Know, will help you choose the best lens for real estate photography.)
Tripod
- K&F Concept 68″ Carbon Fiber Camera Tripod
- SIRUI Carbon Fiber Tripod with Panoramic Fluid Head
- SIRUI Traveler 7C Camera Tripod 65.55 inches
- VICTIV 80″ Camera Tripod, Aluminum Heavy Duty
- JOILCAN Heavy Duty Camera 74″ Tripod
Lighting Gear
Flash/Strobe: Godox (also known as FlashPoint) is well-renowned for high quality flashes at very affordable prices. The Outdoor Flashes are recommended for real estate photography. The AD200Pro Strobe is a good flash to begin with because it covers most room sizes in a residential home. In addition, you can always move the light stand (the flash is mounted on the light stand) to different areas in the room if the flash doesn’t reach the entire space. As you start to get better and as income increases, you can add more flashes to your kit in order to be able to pop multiple flashes simultaneously. Again, this isn’t required to start out. You also need to weigh the cost of carrying a large lighting set up to each shoot against having just one light and taking multiple shots. If you’re a solo photographer, it’s easier to have a one light set up. Don’t use LED lighting. Instead, use Flash/Strobes. (Photography lighting kits are covered in greater detail in our blog post How to Achieve Professional Quality Product Photography Lighting on a Budget.) Flash Trigger: You need a way to trigger the off-camera flash. A flash trigger is a device the camera uses to activate the flash. This device is connected to your flash through the hot shoe (the small bracket on the top of your camera). When the shutter is fired, your camera sends out a tiny electronic pulse to the flash trigger, activating it.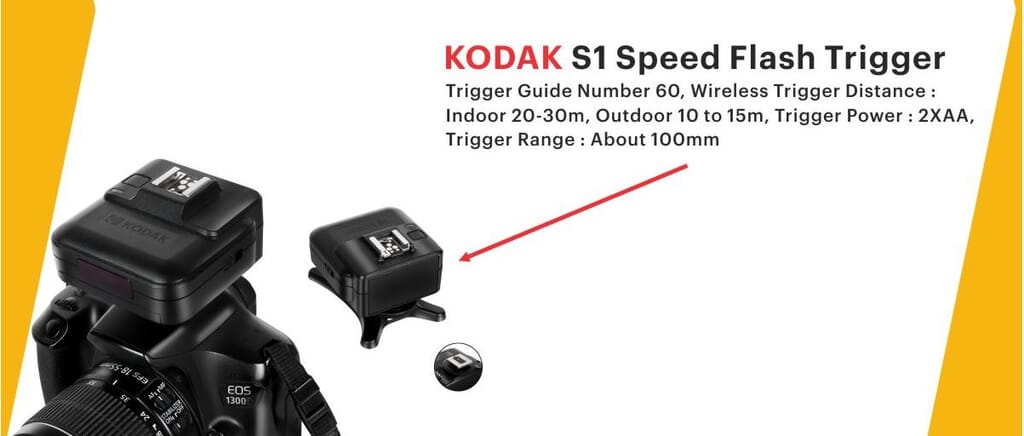
- GODOX 290F Heavy-Duty Light Stand (9.3′)
- NEEWER Air-Cushioned Aluminum Light Stand, 9.8ft/3m
- SMALLRIG Air-Cushioned Light Stand 110″/9.2ft/280cm
- Manfrotto 1004BAC 144″ Air-Cushioned Aluminum Master Light Stand
- Flashpoint Color Coded Pro Air-Cushioned Heavy Duty Light Stand
- Foto&Tech 2.5mm-C3 Remote Control Shutter Release Cable for Canon
- Camera Remote Shutter Release Wireless: [164′] Radio Control Accessories for Canon
- Nikon MC-30A Remote Trigger Release for D4, D800, D700, D300
- Godox TR-N1 TR-N3 Remote Shutter Release for Nikon
- Pixel Remote Commander Shutter Release Cable S2 Compatible with Sony
- Aodelan Camera Wireless Shutter Release Remote Control for Sony
- JJC 40cm Red Mechanical Cable Shutter Threaded Release, Bulb-Lock Design
- Wireless Remote Shutter Compatible for Fujifilm, PIXEL TW-283
Steps to Shoot Flambient Interior Photography
This section focuses on how to capture the minimum required frames needed to create Flambient blend in Photoshop. If you need a basic understanding of interior real estate and architecture photography fundamentals, please see our blog post entitled, “Real Estate Photography Tips & Photo Ideas Every Real Estate Photographer Needs to Know” where we cover everything you need to know to get started in real estate photography.
All steps outlined below assume that you are setting your camera exposures manually. In addition, you will be setting your Flash settings manually. To repeat, do not use Auto Exposure or TTL Flash settings.
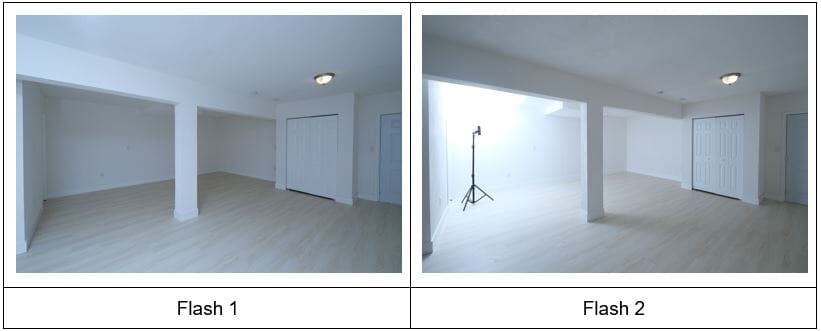
Flambient photography requires a minimum of 2 exposures of a scene (one using flash and another without the flash). If the room is very large and your light source cannot reach the entire space, you may consider moving the flash around to multiple locations in the scene and grabbing multiple flashed shots. This isn’t a requirement, but something you should consider depending on your specific needs.
Capture 1: The Ambient Shot
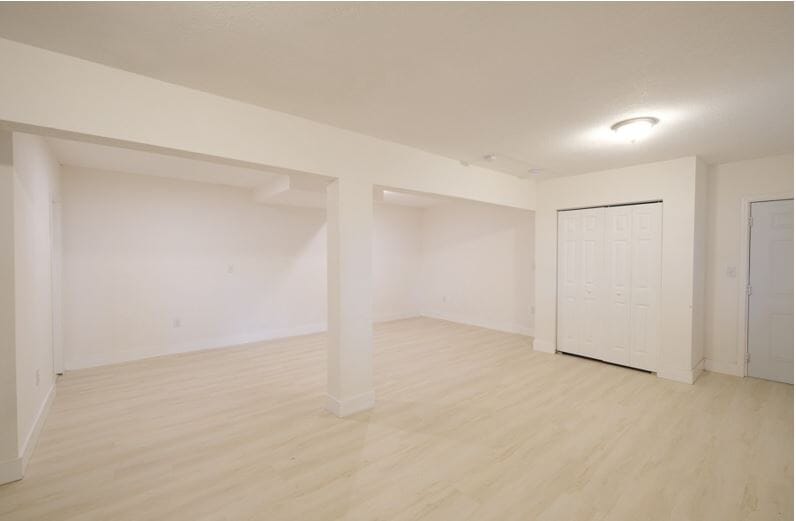
The first image in your stack for the final image (also known as a composite) is the ambient shot. Place the camera on the tripod, set your composition, and set the exposure so your histogram gets a full tonal range. Ideally, you want most of the pixels in your histogram to be weighted on the right side. This is referred to as Capturing to the Right.
You don’t need to be concerned with setting white balance as this frame is only used for capturing the luminosity of the scene. When we stack the images in Photoshop, we are going to use the luminosity blend mode, which completely discards all color information in the image.
Capture 2: The Flashed Shot (or Shots)
The next frame (or frames) are the flashed shots. Again, you will take one or more flashed shots depending on the size of the room and the distance your flash can reach. When you capture a flashed shot, your goal is to eliminate all ambient light. The only light you want to allow into the frame is light that comes from your flash. So, how do you set up your camera to eliminate all ambient light?
This is relatively easy using modern cameras that have live view LCD screens on the back of the cameras. All you need to do is raise your shutter speed up until the point that the back of your camera goes completely black. That’s how you know that all ambient light has been omitted.
The next step is to set up the flash on the light stand. You’ll want to position the flash in a way that allows you to bounce the light off of a ceiling and then allow it to spread evenly over the space you’re trying to illuminate. For a detailed explanation on where to place the flash relative to your camera, please refer to Nathan Cool’s book Mastering Flambient Photography.
The main point of this section is to help you appreciate the important role the flashed image has in the overall Flambient blend. Since we aren’t allowing any ambient light into the flashed image, the flash becomes the dominant light source, and this is how we are able to guarantee color accuracy in the image. Color shifts and color casts occur when multiple light sources with varying color temperatures are mixed in the image and this leads to inaccurate colors.
Capture 3: Window Pull (Optional)
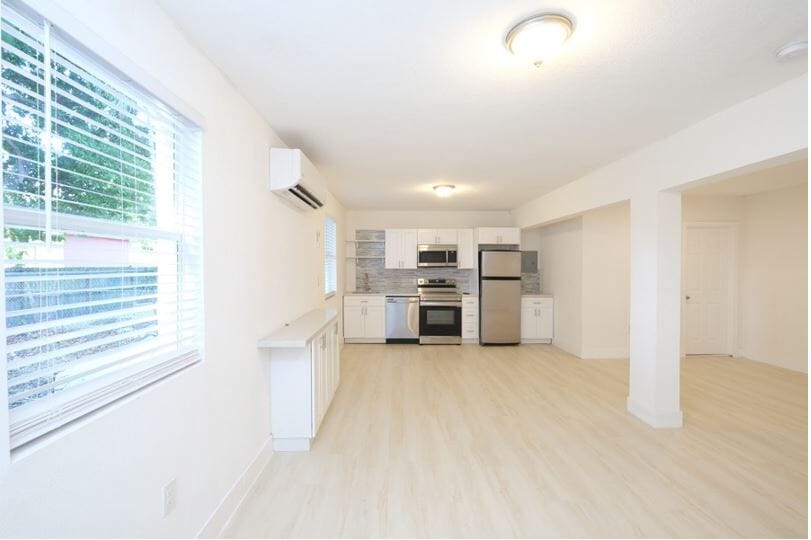
Steps to Edit Flambient Interior Photography Using Adobe Lightroom Classic and Photoshop
Here is a brief summary of the steps that you will need to do within Adobe Lightroom Classic and Photoshop. The steps below assume you have a basic understanding of each of these tools as we are only focusing on the steps specific to creating a Flambient photo.
The workflow begins and ends within Adobe Lightroom Classic. The exact same steps can also be performed with Adobe Camera Raw and Photoshop, but for this example, we will be using Lightroom Classic and Photoshop.
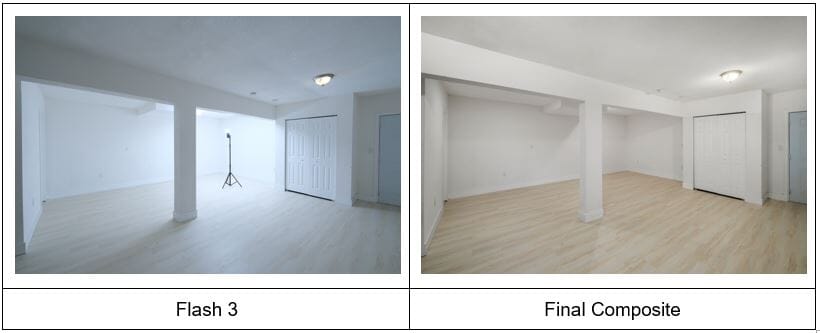
Step 1. After all of your images are imported into Lightroom, locate each of the frames that you captured to create your first Flambient image. For this example, I am only blending two images: the ambient shot and 1 flashed shot.
Step 2. Apply some preprocessing steps to slightly sharpen each frame, apply the appropriate color profile, remove chromatic aberration, and apply the correct lens profile for your camera.
Step 3. Open the individual frames as layers in Photoshop.
Step 4. Change the blending mode of the ambient shot to Luminosity and make the opacity of this layer 50 percent.
Step 5. Flatten all of your layers and save your image as a TIFF file in Photoshop.
Step 6. Once you’re back in Lightroom, make the final tonal adjustments needed to give the image some additional pop.
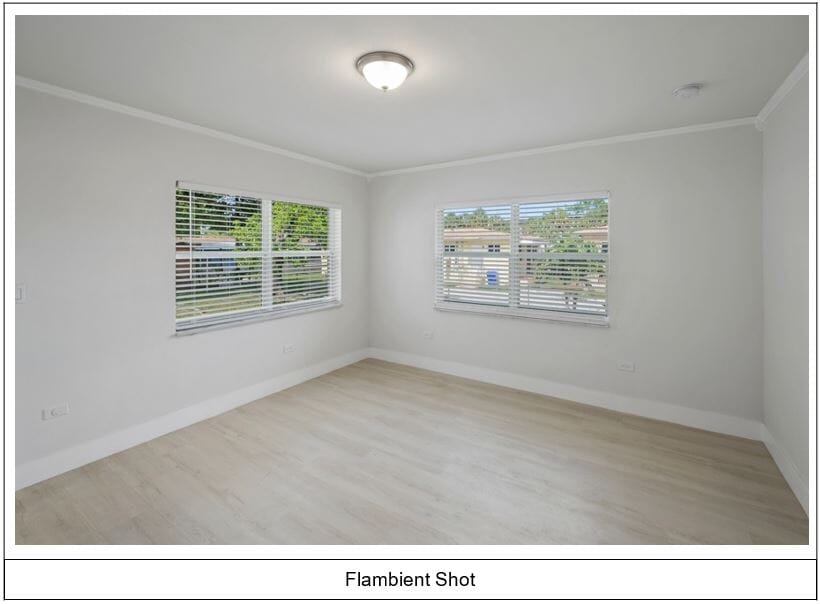
Here is what the final image for this example looks like after performing the above steps.
Where Can I Go for More Training on Flambient Photography?
Conclusion
Flambient is a more time-consuming way of shooting real estate. But the results are generally more accurate in terms of color and sharpness than non-flash real estate photography. For higher-end residential real estate or commercial work, you should really try to incorporate the use of flash. That being said, you need to think about your business needs and whether your customers really need the level of accuracy that Flambient provides.
At Picsera, we serve many photographers who shoot simply 1-shot frames as well as brackets without flash. As retouchers, we prefer having images shot with artificial lighting because it’s easier for us to do the proper color matching. But our editing techniques can handle any type of real estate photography, and we can generally deliver high-quality results regardless of your style of shooting.
Need help with editing photos? Let us do the work for you. Start your FREE trial today!
Your email address…

Picsera was founded in 2014 by David Sinai, a serious ameteur photographer who spent the first 20 years of his career working in the financial technology space. With a track record of building innovative solutions and working with offshore partners, David started Picsera to help photographers work more efficiently by enabling them to outsource their image editing. With very affordable rates and incredibly fast turnaround times, photographers from a variety of industries (eCommerce, real estate, weddings and portrait studios) enjoy larger, more successful businesses while still maintaining more time for their families, friends, and hobbies. Today, David and his team at Picsera assist all kinds of content creators with 3D modeling and rendering and video editing. When David is not working you’ll find him spending time with his family, mountain biking, or capturing landscapes throughout South Florida with either his pro cameras or drone.


