In our previous article The ABC’s of Color Correction we discussed the difference between global adjustments and retouching. We also looked at adjusting the black and white points to create a balanced histogram. In this article, we will further discuss the types of global adjustments that can be made to your images.
We’ll cover different ways to crop images, composition techniques, and the use of the Rule of Thirds. We will also touch on using presets to create an artistic style for your portraits. All of these elements are a part of the second stage of your post-processing workflow. They are just as important to creating a polished-looking product as any other stage of your workflow.
Cropping images – The Ratio Debate
As a general rule, most seasoned photographers will tell you to crop your images before showing them to a client. Many pros make mental notes when shooting. They instinctively envision their photographs and how they will crop an image in post-processing. Remember to save yourself some time in front of the computer by taking a quick second to scan the scene and notice the small details. In the long run, this practice will make you a stronger photographer.
When framing your shot, it’s always best to leave some space around your image. This helps when you need to crop later on or straighten the horizon. Leaving the room ensures that you will have nice even framing for your image. On a few occasions, I accidentally framed an image with my models too close to the edge of the frame. Then in post-processing, I’ve discovered that there isn’t enough room to adjust and straighten the horizon. This means I have to do additional editing by extending an image.

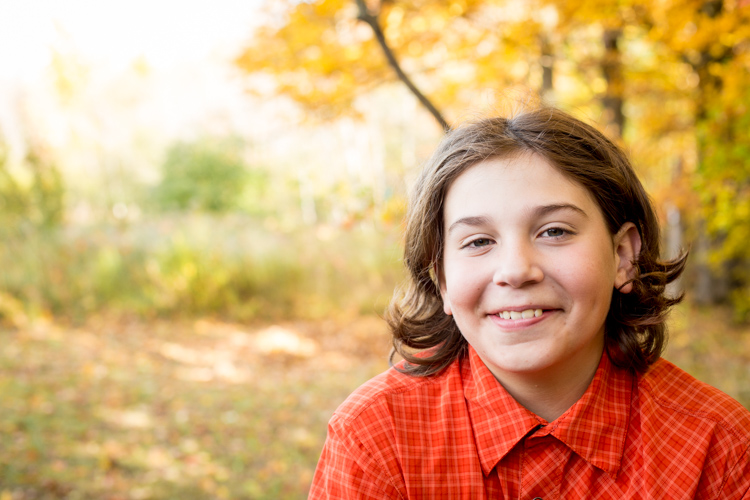
In this image, I framed that boy too close to the edge and his right hand was cut off when I tried to print this on canvas. I had to take the time to extend the canvas to make the framing correct.
Leaving a little bit of space is also useful when printing gallery wraps. I always try to leave enough space for the image to wrap around my stretcher bars. This saves me time in post-processing. I don’t have to create a mirror edge or clone in more detail. On the odd occasion when I have made this mistake or the scene just doesn’t allow me the luxury of extra space. I like to use prime lenses and sometimes there just isn’t room to back up and leave some space. In these situations, I’ve used Picsera’s background extender service. It saves me a lot of time when the framing of an image just doesn’t work out.
Cropping for Popular Frame Sizes
One of the bigger issues that most photographers deal with when presenting images to clients involves dealing with aspect ratios. The most popular size of frames just doesn’t match the aspect ratio of our cameras. The classic 8 x 10 shot presents a problem in that a photographer has to crop his images to reflect this common size.
Common sense says that we should crop our images to fit the 8 x 10 sizing. However, I have found that clients like to order a variety of sizes that will fit the frames they have at home. One image may be ordered as a 5 x7 while another is ordered as an 8 x 10. As a result, an image will appear differently with each size chosen.
If you show images to your clients in one aspect ratio and then deliver an image in a different ratio, you may run into clients who are unhappy with the finished image. I have had this occur on a few occasions. A client has not understood that an image cannot simply be recreated at any size.
Instead of struggling with cropping and aspect ratios think about educating your clients. Show them how aspect ratios work. I have a set of mats that I take to client portrait reviews. Each mat is cut to a different aspect ratio. I then lay these mats over an image to give clients an idea of how the final product will appear. I generally take 1 or 2 finished prints for a review and use these to help my clients understand the aspect ratio and how cropping affects an image. I find this method works quite well. My clients then become more knowledgeable about the post-processing stages of photography. It helps them to appreciate the skill required to shoot beautiful portraits. I want them to understand why it’s important to pay a professional. We understand photography and can ensure that each portrait looks amazing when printed.
The Rule of Thirds and Portrait Photography
When framing an image in portrait photography we usually stick with the conventional rule of thirds. Most clients are looking for conventional and timeless images of their families. We’ve all seen the dated images from earlier decades and the last we want is for our photographs to appear on those websites that feature bad photography.

I’ve circled the four points of focus for the Rule of Thirds. In this case, the image is classically composed with the boy’s eyes running along the lines of thirds.
It’s important to create timeless photos but you should consider throwing in a few images that are composed in a non-typical fashion. Think about pushing a few of your compositions into the realm of the unconventional. Some clients will really love it if you create an image that stands out from the rest. It may just result in the sale of a larger and more lucrative print. Imagine displaying an image that catches the eye of everyone who views it. Then they ask “Who took that photo? It’s amazing?” These type of eye-catching shots may just land you another photography job. Creating some images that are composed along less conventional lines will allow you to expand your creativity and artistic flare. Think about experimenting with both the classic/conventional look and something more risque. Many famous photographers use the saying “Learn the rule of thirds and then intentionally break the rules to create something amazing.” Consider the examples below. One image is very convenient while the other is shot using an unconventional style. Both methods have their benefits.
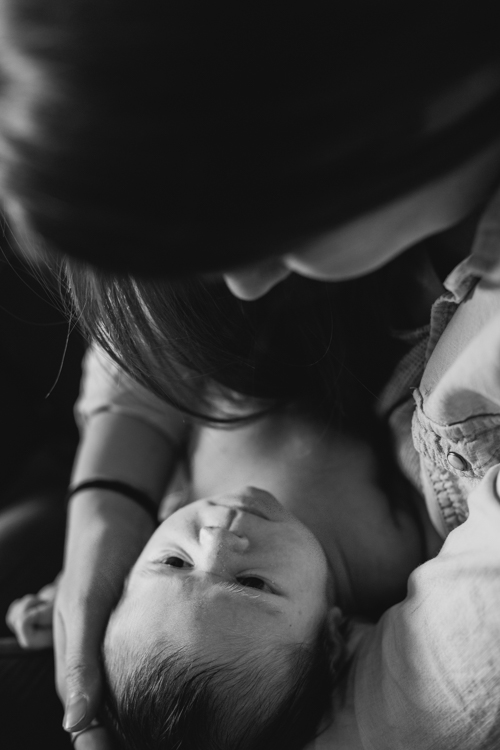
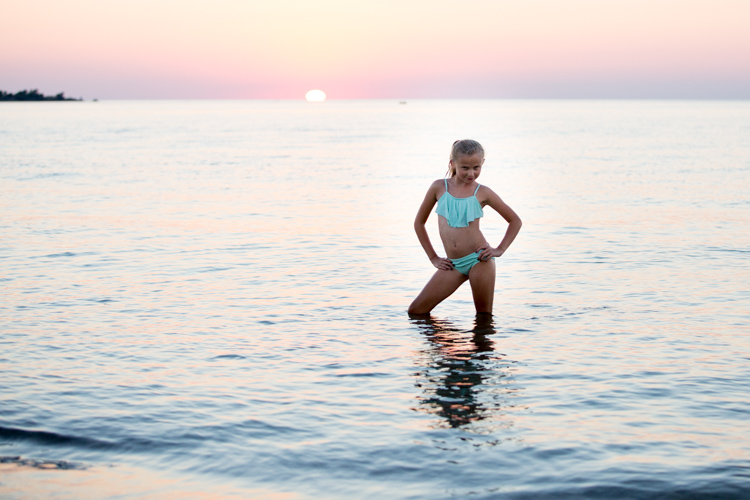
Example of Conventional Composition:
Example of Unconventional Composition
The Ultimate Shortcut – Presets
Purchasing presets or creating your own is a fantastic way to streamline the color correction process. Presets are basically formulas that you can use to help you adjust your photos. These presets use combinations of settings to create a look that can unify a portrait session or define your artistic style.
Presets are very much like the types of filters available to Instagram users. They apply lighting, white balance settings, vignettes, bokeh, etc. to your images. There are literally thousands of companies offering preset packages for purchase. One of my favourite presets is called “Carmel Pop” from Hacking Photography. I love using this preset for my family portrait sessions. The colors are beautiful and rich. The preset also warms up each of my images and adds a vignette that puts all the focus on my clients. They love the effect.
With a preset of Carmel Pop…

Before preset Carmel pop…
This preset suits my brand. Clients know that they will get images rich with color and vibrancy. In fact, many will choose to have their photos taken because of this element. I am known for my bright and warm family images.
It’s important, however, to remember that presets are not a magic wand. There are times when a preset may not work well with the lighting, colors or backdrop you are using.
Consider this example:
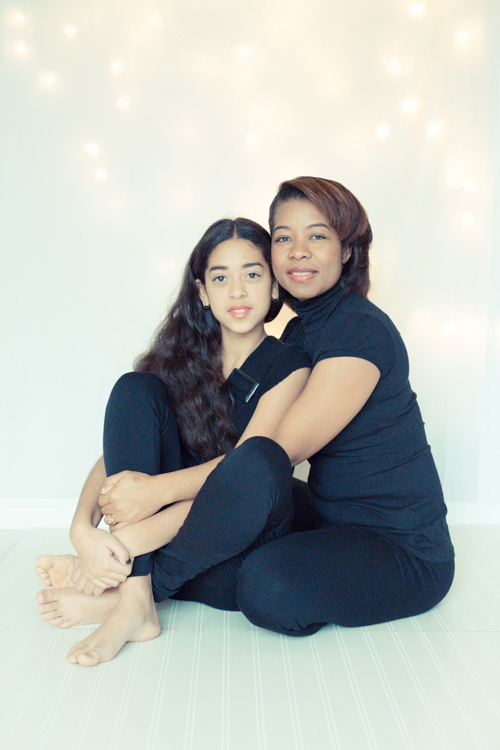
My favorite Carmel Pop just didn’t do their skin tones any justice under the studio lights. I had to design a different look for this shoot. I went with yellowed and blue tones instead.
My client wanted a very specific look. It was completely different from my typical natural light work. She wanted something that was shot in a studio rather than outdoors. She explained she wanted something sleeker and more formal. In this case, my favourite preset made my client look terrible. I had to design my own preset that better reflected the style client was looking for. Once I had the settings adjusted to the way I felt looked best I then created a preset which I applied to all of my images. The client was extremely happy.
It is well worth the expense to purchase some presets. They will save you lots of time when color correcting your images. Presets are also your opportunity to put your own creative stamp onto the images you create. There are so many options available. Better yet try to create your own. Play with options like white balance, saturation, and vignette to create looks that will set your work apart from the crowd. Perhaps you are feeling crunched for time think about talking to us about our family portraits package. We will discuss the type of artistic feel you would like to see in your images and work to create a unified set of images you can display to clients.
Use Global Adjustments and Color Corrections to bring out the Best in your Work!!!
You are a talented photograph who skillfully crafts photographs. The images you capture are beautiful they just need a few tweaks to bring out their true beauty. Global adjustments do not need to be dramatic reworkings of each image. Instead, global adjustments are small fixes made to help enhance your skills as a photographer. You’ve taken the time to shoot beautiful RAW files make sure that you take advantage of all of this fantastic data. Make edits that keep your images feeling natural. Be gentle when adjusting those sliders. There is such a thing as over-processing your images.
Of course, if you are a beginner to the post-processing part of photography or perhaps you’re a photographer who shoots high volumes then it might be more practical to outsource you’re editing. We will always edit photographs to your specifications. It’s our job to streamline your workflow and make you more efficient. The results are always guaranteed. Check out our editing packages today!