A DIY virtual staging platform works inside your browser. Hence, you don’t need to install or download anything. This is the beauty of these platforms. You don’t need to own 3D modeling and rendering software such as Blender, 3DS Maya, or Auto Cad. You also don’t need to be proficient in using these complex applications that can take years to master.
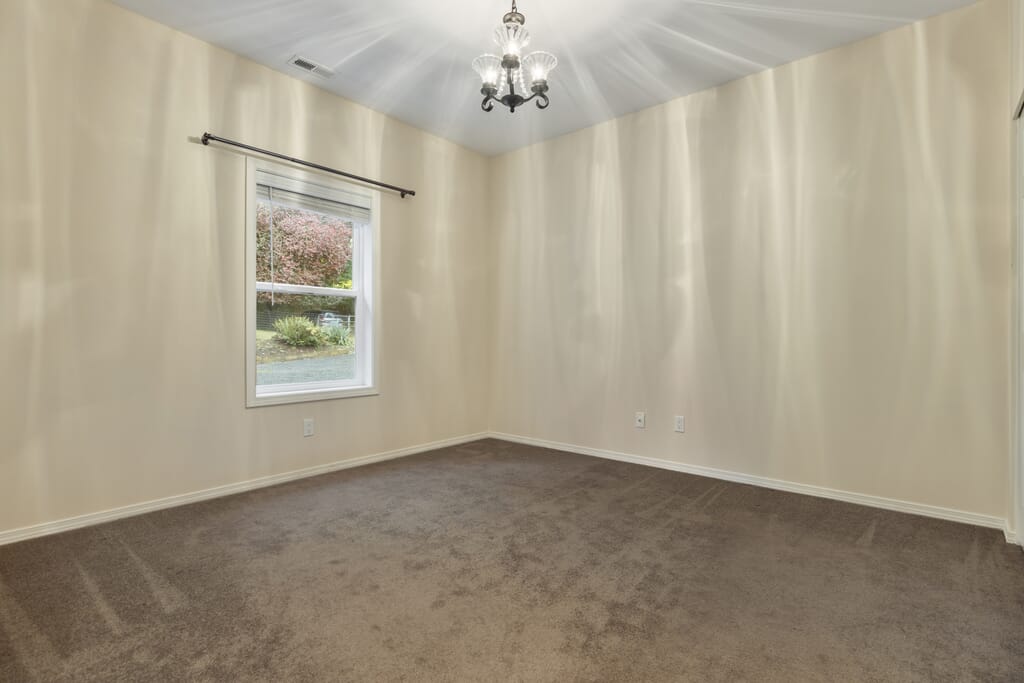
First of all, you click images of a room from various angles—preferably the four corners—and upload them to the virtual staging platform. Then, you erase any furniture or clutter from the image. (Note: Not all tools offer this feature.) Next, you can pick from over a thousand furniture items. You then click on the furniture you desire to place, tap on it or drag it. After you complete the virtualized rubdown of all rooms, the property is ready to stage.
Let me explain the entire DIY virtual staging process in greater detail.
Step 1: Create an account by signing up on Apply Design.io or any virtual staging platform of your choice and sign in to your account.
Step 2: Select new property/new project. Enter all the details of the property you desire to stage.
Step 3: Choose only the images you want to stage. Click on Upload Photo and click Save.
Step 4: On the next screen, you’ll see the images you’ve uploaded. Pick the image you want to work on. You’ll get a lot of prompts. While some are useful, you can ignore most.
Step 5: In this step, you align the vertical lines in the image. There are two parts to this alignment. In the first part, you use the window or door frames for reference and find the coordinates of two straight vertical lines.
Step 6: Click Next (top right) once you’re finished. This is the second part. You’ll align the far corners of two adjacent walls by marking the bottom left and top left dots and the bottom right and top right dots. These two sets of blue and green bars should touch the corner dots of the ceiling and floor. The alignment part is finished.
Step 7: The fun part starts now. Click on the plus (+) sign. Next, click on Collections first and then on Room Type. Choose the Room Type and start adding furniture, one item at a time.
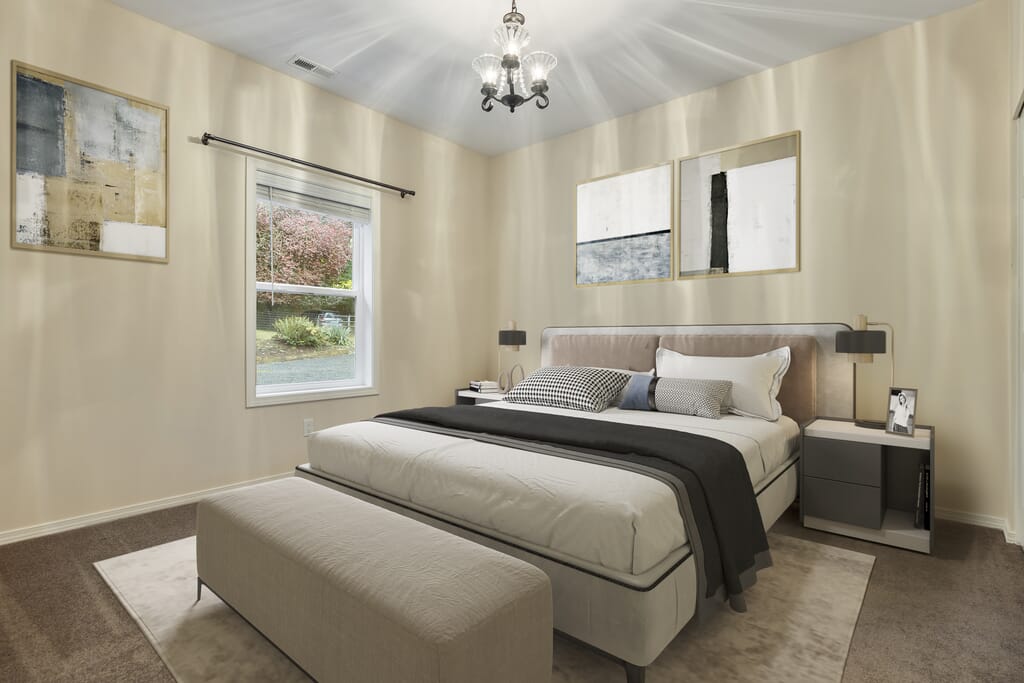
Step 8: Let’s say the room style you have chosen is a living room or bedroom. If you want to place a TV, go to the bottom of the room scroll (the different room elements are in alphabetical order). From the available TV options, choose the one you want by clicking on it. Click on the plus button to move the TV and drag it to place it against the wall you desire.
Step 9: Similarly, you can choose an area rug, couch, bench, curtains, or coffee table. In the finishing touch, you can add a plant in one corner and artwork on the wall.
Step 10: Complete all the rooms, one by one. Bring all the rooms together so that you can see from different angles.
Step 11: Click Save and download the photo. This last step is important. Make sure you click on Download the scene. Don’t click on Download the photo. (The reason is the scene is what is staged, and the photo is what you uploaded initially.)