Make your hard work show its true colors!
It’s time to move on to the second stage of the photo editing workflow. The second stage involves making global adjustments to your photographs. In this stage, you are now focused on taking your beautiful images and tweaking them to bring out their true character and flare.
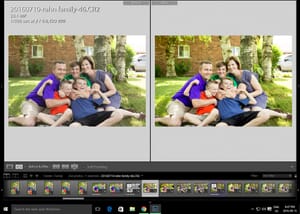
Here’s an example of a file that has had global adjustments made. The white balance, black and white points, vibrancy, and exposure were slightly adjusted to enhance the image:
Most photographers will use Lightroom or Camera Raw to make color corrections to their images. They are extremely easy to use and very popular. Lightroom was designed for photographers. It contains all the required dialogue boxes within the develop module for making color corrections. Camera RAW is just as powerful as Lightroom both programs will produce beautiful results. They use the same image editing engine so feel free to adjust your work using this program.
The Benefits of Shooting in RAW
In order to get the best out of your images, you should always shoot in RAW. RAW files are just that- they are RAW data. Each file contains the most information that your camera can possibly collect. This is in contrast to Jpeg files which are created by your camera. Essentially, the camera takes an image and then throws away data or aFdjusts the file according to its own specifications. A Jpeg is a finished file edited by your camera. In contrast, RAW files contain all the information you need to edit and adjust the image to your own preferences. Picsera recommends shooting your images in RAW. You have more flexibility when editing your photos.
Global Adjustments and Retouching – They are two very different things!
It is important to understand the distinctions between color correcting images and retouching images. When correcting color you are making adjustments to the entire image. These type of adjustments are considered global. They enhance the overall effect of the photograph. When color correcting an image a photographer is looking at elements like exposure, white balance and cropping.
Retouching is considerably different in that the photographer will focus on making adjustments to the image that are more localized. This might include smoothing skin, removing blemishes or cleaning up stray hairs. These type of edit are more finicky and take longer to complete. They also require a higher level of photo editing skills to complete properly. Picsera offers a wide variety of options for retouching and photographers should take a look at all the different packages we offer. We can help you to retouch your images if you are uncomfortable with this phase of the workflow.
When correcting color you are making adjustments to the entire image, while retouching is more localized
Here’s the same image from above. The one at the top is the color corrected image. The image at the bottom is the retouched photo. Notice that I removed the vehicle from the background. That took a considerable amount of time to complete.
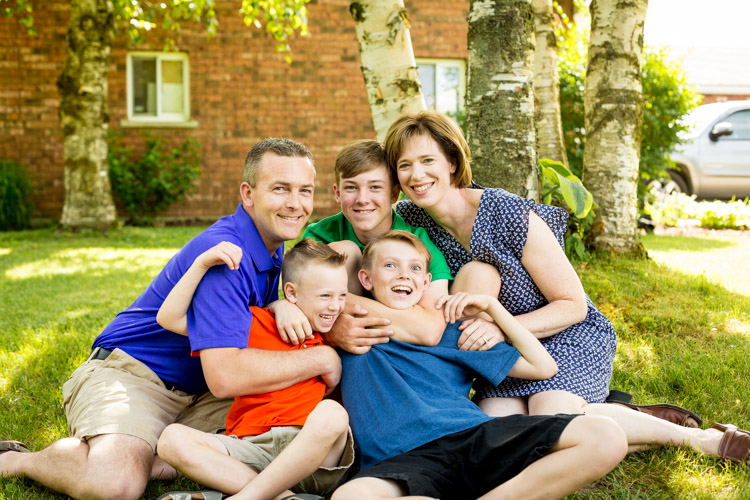
Color Corrected Image Above
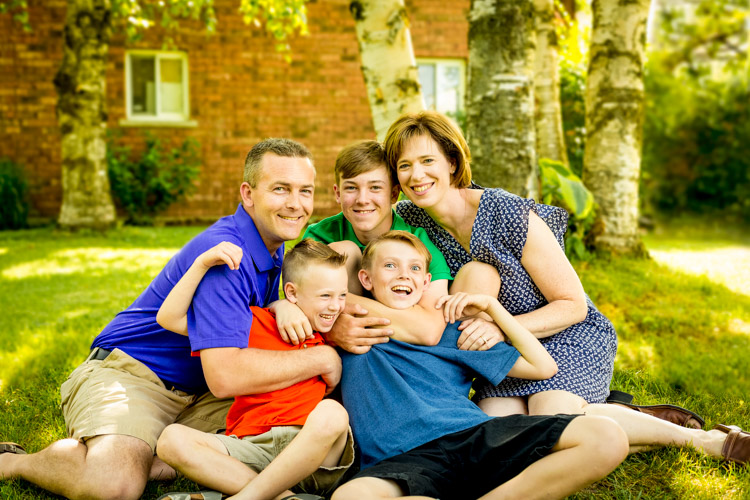
Retouched Image Above
Throughout the industry, it is understood that photographers will make global adjustments to proofs. We generally leave the complicated retouching until a client chooses specific images they wish to purchase. After a client chooses their favorites a photographer will retouch the images a client wishes to purchase.
Proofs are small images and the enhancements made during retouching are not necessary for these smaller prints. Instead, photographers should focus on making basic global adjustments for proofs. It makes very little sense to spend a great deal of time retouching a photograph that your clients may not purchase. Instead, focus your efforts on making the adjustments that will help you to efficiently present clients with photographs.
How to Show the Subject’s True Colors in Your Images
Showing the real color in your images is very important, especially in food and product photography. Having a berry that looks off color won’t look appealing, or having an image of a t-shirt that is not true to color can hurt the business’ sales.
The trick is to determine the correct white balance. You can use a gray card or a light meter to assist you in setting the proper white balance. There are times, however, where the light changes or the action moves quickly to another scene. Clients are not always willing to stand around while you take measurements. This is why it’s always best to shoot in RAW. You can easily adjust white balance when editing your photographs. Take the time to look at your white balance but also remember that getting the focus right and composing your photographs well are the most important elements of a photo shoot.
I’ve taken many different editing courses over the years. Programs change so quickly that it’s important to keep your skills up to date. This takes time and money but is definitely worth it if you want to ensure you edit your own images properly. That’s why many photographers will outsource image editing. They don’t have to worry as much about having the most current knowledge and skills and can focus on taking great pictures.
Steps in the Color Correction Workflow
As a general rule of thumb, photographers use the following workflow to edit their images.
- Adjust white balance
- Adjust Exposure
- Tweak white and black points
- Ensure that highlights and shadows are correct
When editing, it’s very important to adjust black and white points properly. Remember to create points of pure black and pure white within your image. This ensures your histogram is stretched out to touch both ends of the graph. A histogram is a graphical representation of the tonal values in an image. It shows the amount of tones of particular brightness found in your photograph ranging from black (0% brightness) to white (100% brightness). By including all tonal values in your image you create a depth to that helps to enhance finished photograph.
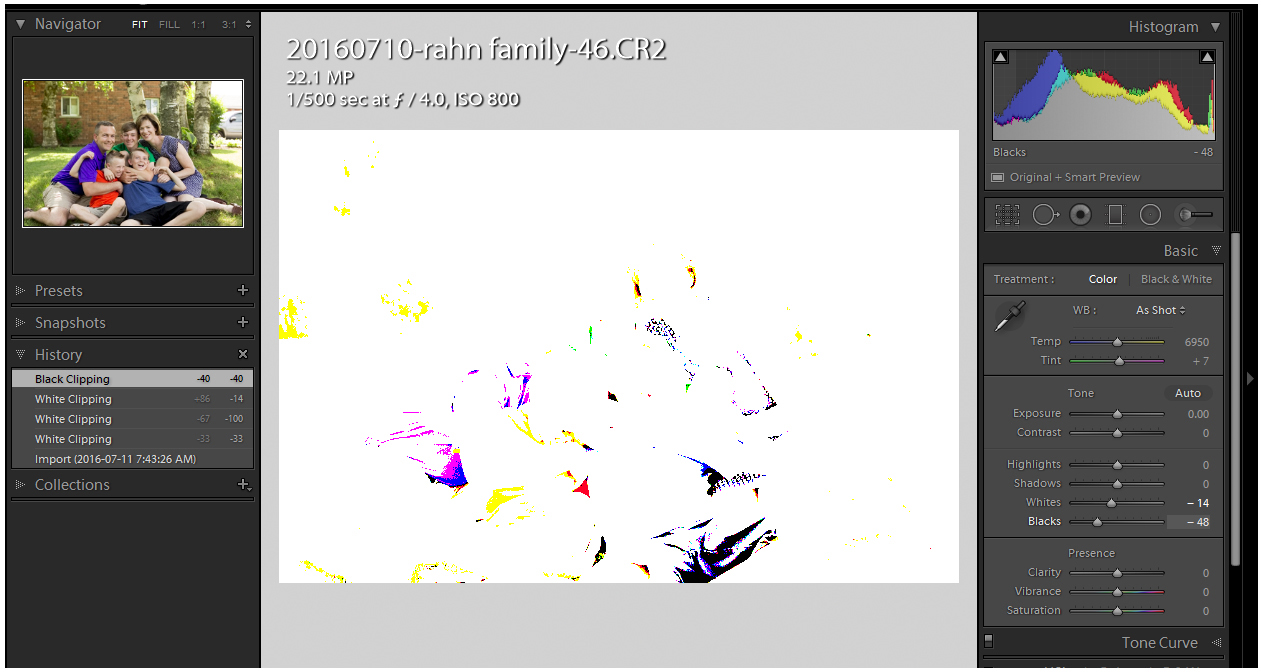
To ensure that you have both black points and white points within an image hold down the Alt key while adjusting sliders. The screen will display these amount of pure white or black in an image as you move the slider.
When working with RAW files, you will always have to adjust the contrast. These files are usually quite flat straight out of the camera. Unlike a Jpeg which has been edited by your camera software, a RAW file requires you to edit the image and set the amount of contrast you wish to see within the photograph.
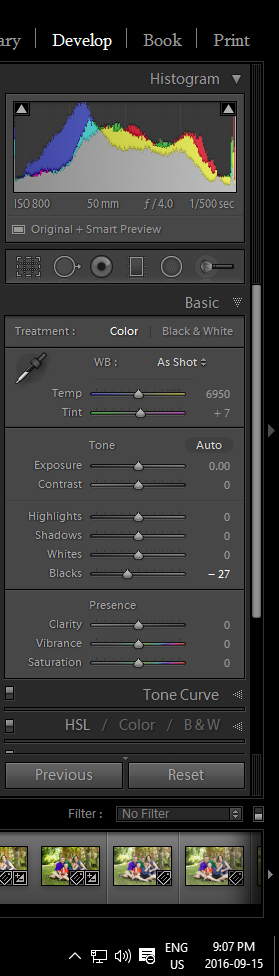
In this screenshot you can see the sliders as well as the histogram. Notice has the image tones are stretched across the entire length of the histogram. This means the image contains both pure black and pure white points.
Other sliders that can be adjusted during the color correction stage include vibrancy and saturation. Most photographers prefer to adjust vibrancy over saturation. The color tones are much more appealing when you adjust vibrancy.
Another effective Lightroom tool is the tone curve. Consider using this tool to adjust your highlights and shadows. It’s an effective method that gives more control than the sliders in the basic adjustments tab.
It’s time for a Lightroom Shortcut
We’ve talked a lot about different ways to tweak and enhance your photographs but haven’t mentioned much about how to save some time while completing your edits. Making global adjustments to your photographs does not have to be onerous. You can batch process images that have the same exposure and lighting by following these steps.
- Make all your global adjustments to one image
- Return to the Library module.
- Click “Develop Settings”
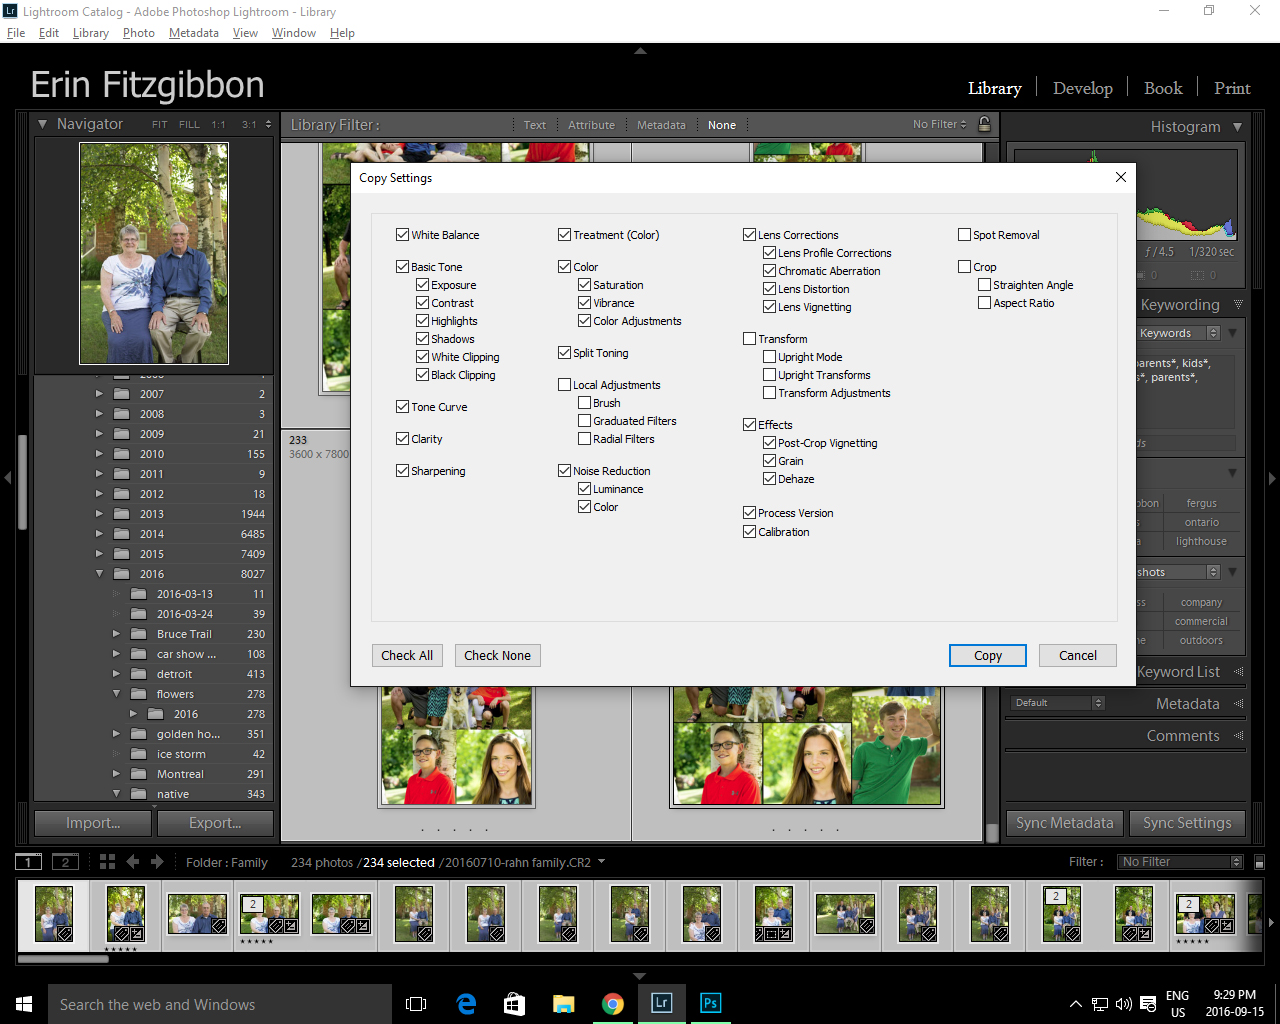
- Choose “Copy Settings”
- A box will appear in which you can check off the settings you wish to sync to all of your other photographs. Ensure everything is properly checked off. You wouldn’t want to forget to sync the exposure or the white balance.
- Highlight all the images to which you would like to apply the same settings
- Once these images are highlighted click on “Photo” once again and choose “Develop Settings”
- You will then see an option for “Sync Settings”
- Lightroom will then sync the setting for each of your photographs
You still need to go through each image and ensure that you like how the applied settings appear but essentially you have finished this part of the editing process. Lightroom really is one of the best programs for working with your photographs.
After you have completed these simple color corrections it’s now time to show off all your hard work to clients. I know I mentioned earlier that you should your time wisely and save retouching until a client has chosen their favorite images but it’s also a nice touch to completely edit and retouch one image. I generally choose a photograph from the collection that is sure to be a hit with the client. I will print this image and present it to clients as a free gift. It’s a nice touch that they appreciate. By retouching one image I also help clients to get a feel for the quality and look of their fully edited photographs.
Making global adjustments to your photographs does not have to take hours and hours. By developing an effective workflow you can ensure that you use your time effectively. Unfortunately, like everything else developing editing skills and an efficient workflow take lots of practice. I know it took me several years to develop my own efficient manner of editing photos. If you are stretched for time and are struggling to develop your own workflow consider using Picsera to soften that learning curve. We can help you with all stages of the post-processing required when working as a professional photographer.