How does drone lens focal length affect architectural photography?
In architectural drone photography, choosing the right lens focal length dictates structural accuracy. While wide-angle drone lenses capture expansive environments, they introduce edge distortion and exaggerate proportions. Utilizing a telephoto drone lens (such as 70mm or 168mm) allows for lens compression, flattening the perspective to match an architect’s original elevations while preserving true vertical lines and structural proportions.
I finally took the Mavic 4 Pro out to shoot the brand-new Irma and Norman Braman Comprehensive Cancer Center on Alton Road in Miami Beach. For a full breakdown of how this specific aircraft holds up under professional scrutiny, you can read our Mavic 4 Pro Case Study. CannonDesign did an amazing job with this 200,000-square-foot facility, which just opened its doors in May 2026. It’s built so South Florida families don’t have to travel across the country for top-tier cancer care, and it also serves as a major medical lifeline for international patients traveling all the way up from South America for treatment.
For an architect, every single curve on this building serves a purpose. Those massive, undulating concrete waves I was flying around aren’t just for show—they actually provide passive self-shading for the massive windows. Inside, the chemotherapy infusion bays are pushed right up to the glass, giving patients calming views of Biscayne Bay and the gardens to help reduce clinical anxiety.
If you want to get an architect excited about your photos, you have to stop thinking like a tech nerd obsessed with megapixels and start looking at how the camera shapes the building. When you have three separate lenses on a drone, switching cameras completely alters the proportions of the architecture and how it sits in the environment.
Capturing the right perspective in the air is only half the battle; managing the multi-frame stitching and exposure shifts afterward requires a precise post-production pipeline. To see how we blend these frames seamlessly, check out our Professional Retouching Case Study. Here is what I learned during the shoot, how I made my decisions in the air, and exactly what I’m going to walk you through in my upcoming video.
1. Testing the 168mm for a Full Facade Shot
Let’s start with the long 168mm lens. Most people think this lens is only for tight detail shots, but I wanted to see if I could use it to get a massive photo of the whole front o
When architects design a building, they look at flat, balanced drawings. Wide-angle lenses usually ruin that look because they stretch out the edges. By backing the drone way out over the bay and using the zoom of the 168mm, I was able to flatten everything out nicely.
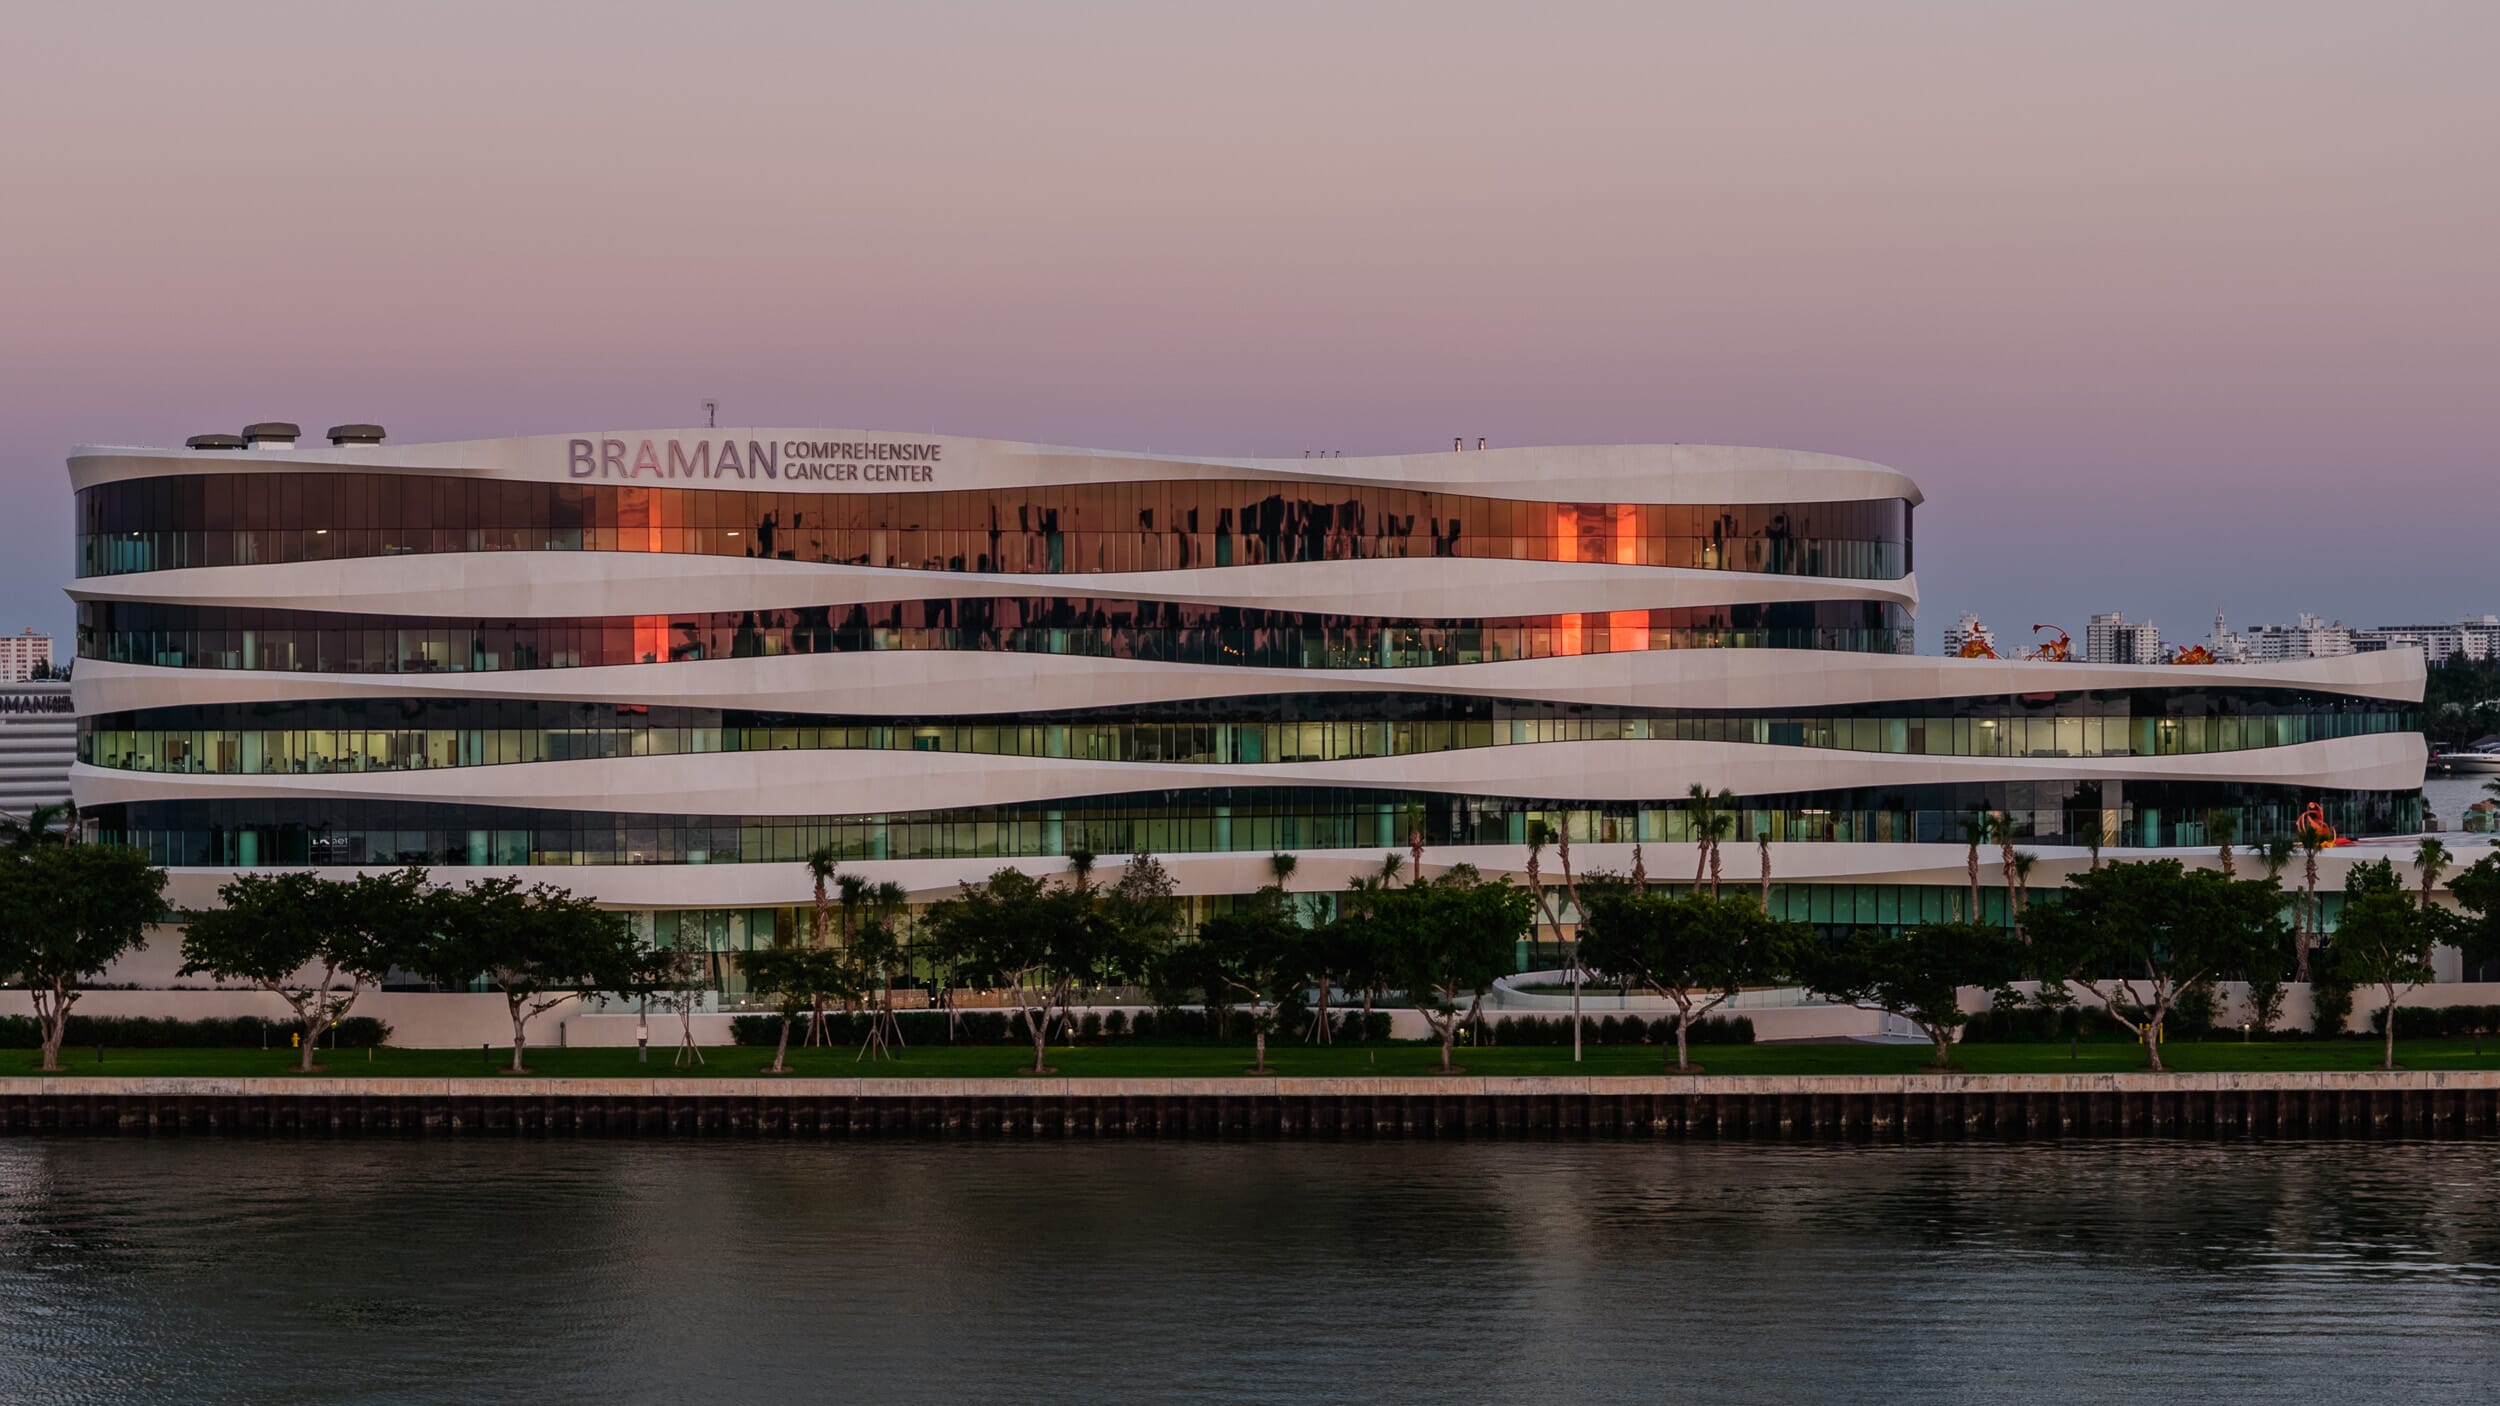
I turned the camera into portrait mode and shot a 7-image horizontal panorama. Because I was so far back, the drone barely had to turn between shots, which gave Lightroom the perfect angles to stitch a straight panorama. The final image looks like a high-end digital drawing where the front and back of the building are perfectly in proportion, beautifully honoring the shading fins and panels exactly how the architects modeled them.

The Catch: But that telephoto lens left me with a headache in post-production because of the lens distortion. When I opened the stitched file, the straight lines were noticeably bent. I had to spend a ton of time wrestling with geometry corrections just to flatten them back out.
Honestly, it makes you a little nervous warping a file that much because you worry you’re accidentally changing the actual shape of the building. If I had flown even further back, the distortion would have dropped—but then I would have lost the crisp textures I wanted. It’s a tough trade-off.
2. Why the 70mm Ended Up Being the Sweet Spot
Now, if I tell you that the 70mm lens was my favorite choice for this shoot, anyone who knows drone specs is going to think I’m crazy. The 28mm main camera has a massive sensor and is natively the much better camera. The 70mm isn’t better hardware by any means.
But on this specific day, for this specific building, the 70mm gave me the best results because it solved two massive problems: keeping the lines true and giving me great background compression.
- Better Background Compression: This is the real visual win with the 70mm. Because it’s a longer lens shot from further back, it brings the background forward. On the 28mm, the Miami skyline and everything behind the building shrinks and looks tiny. The 70mm keeps the background elements substantial, which frames the building beautifully.
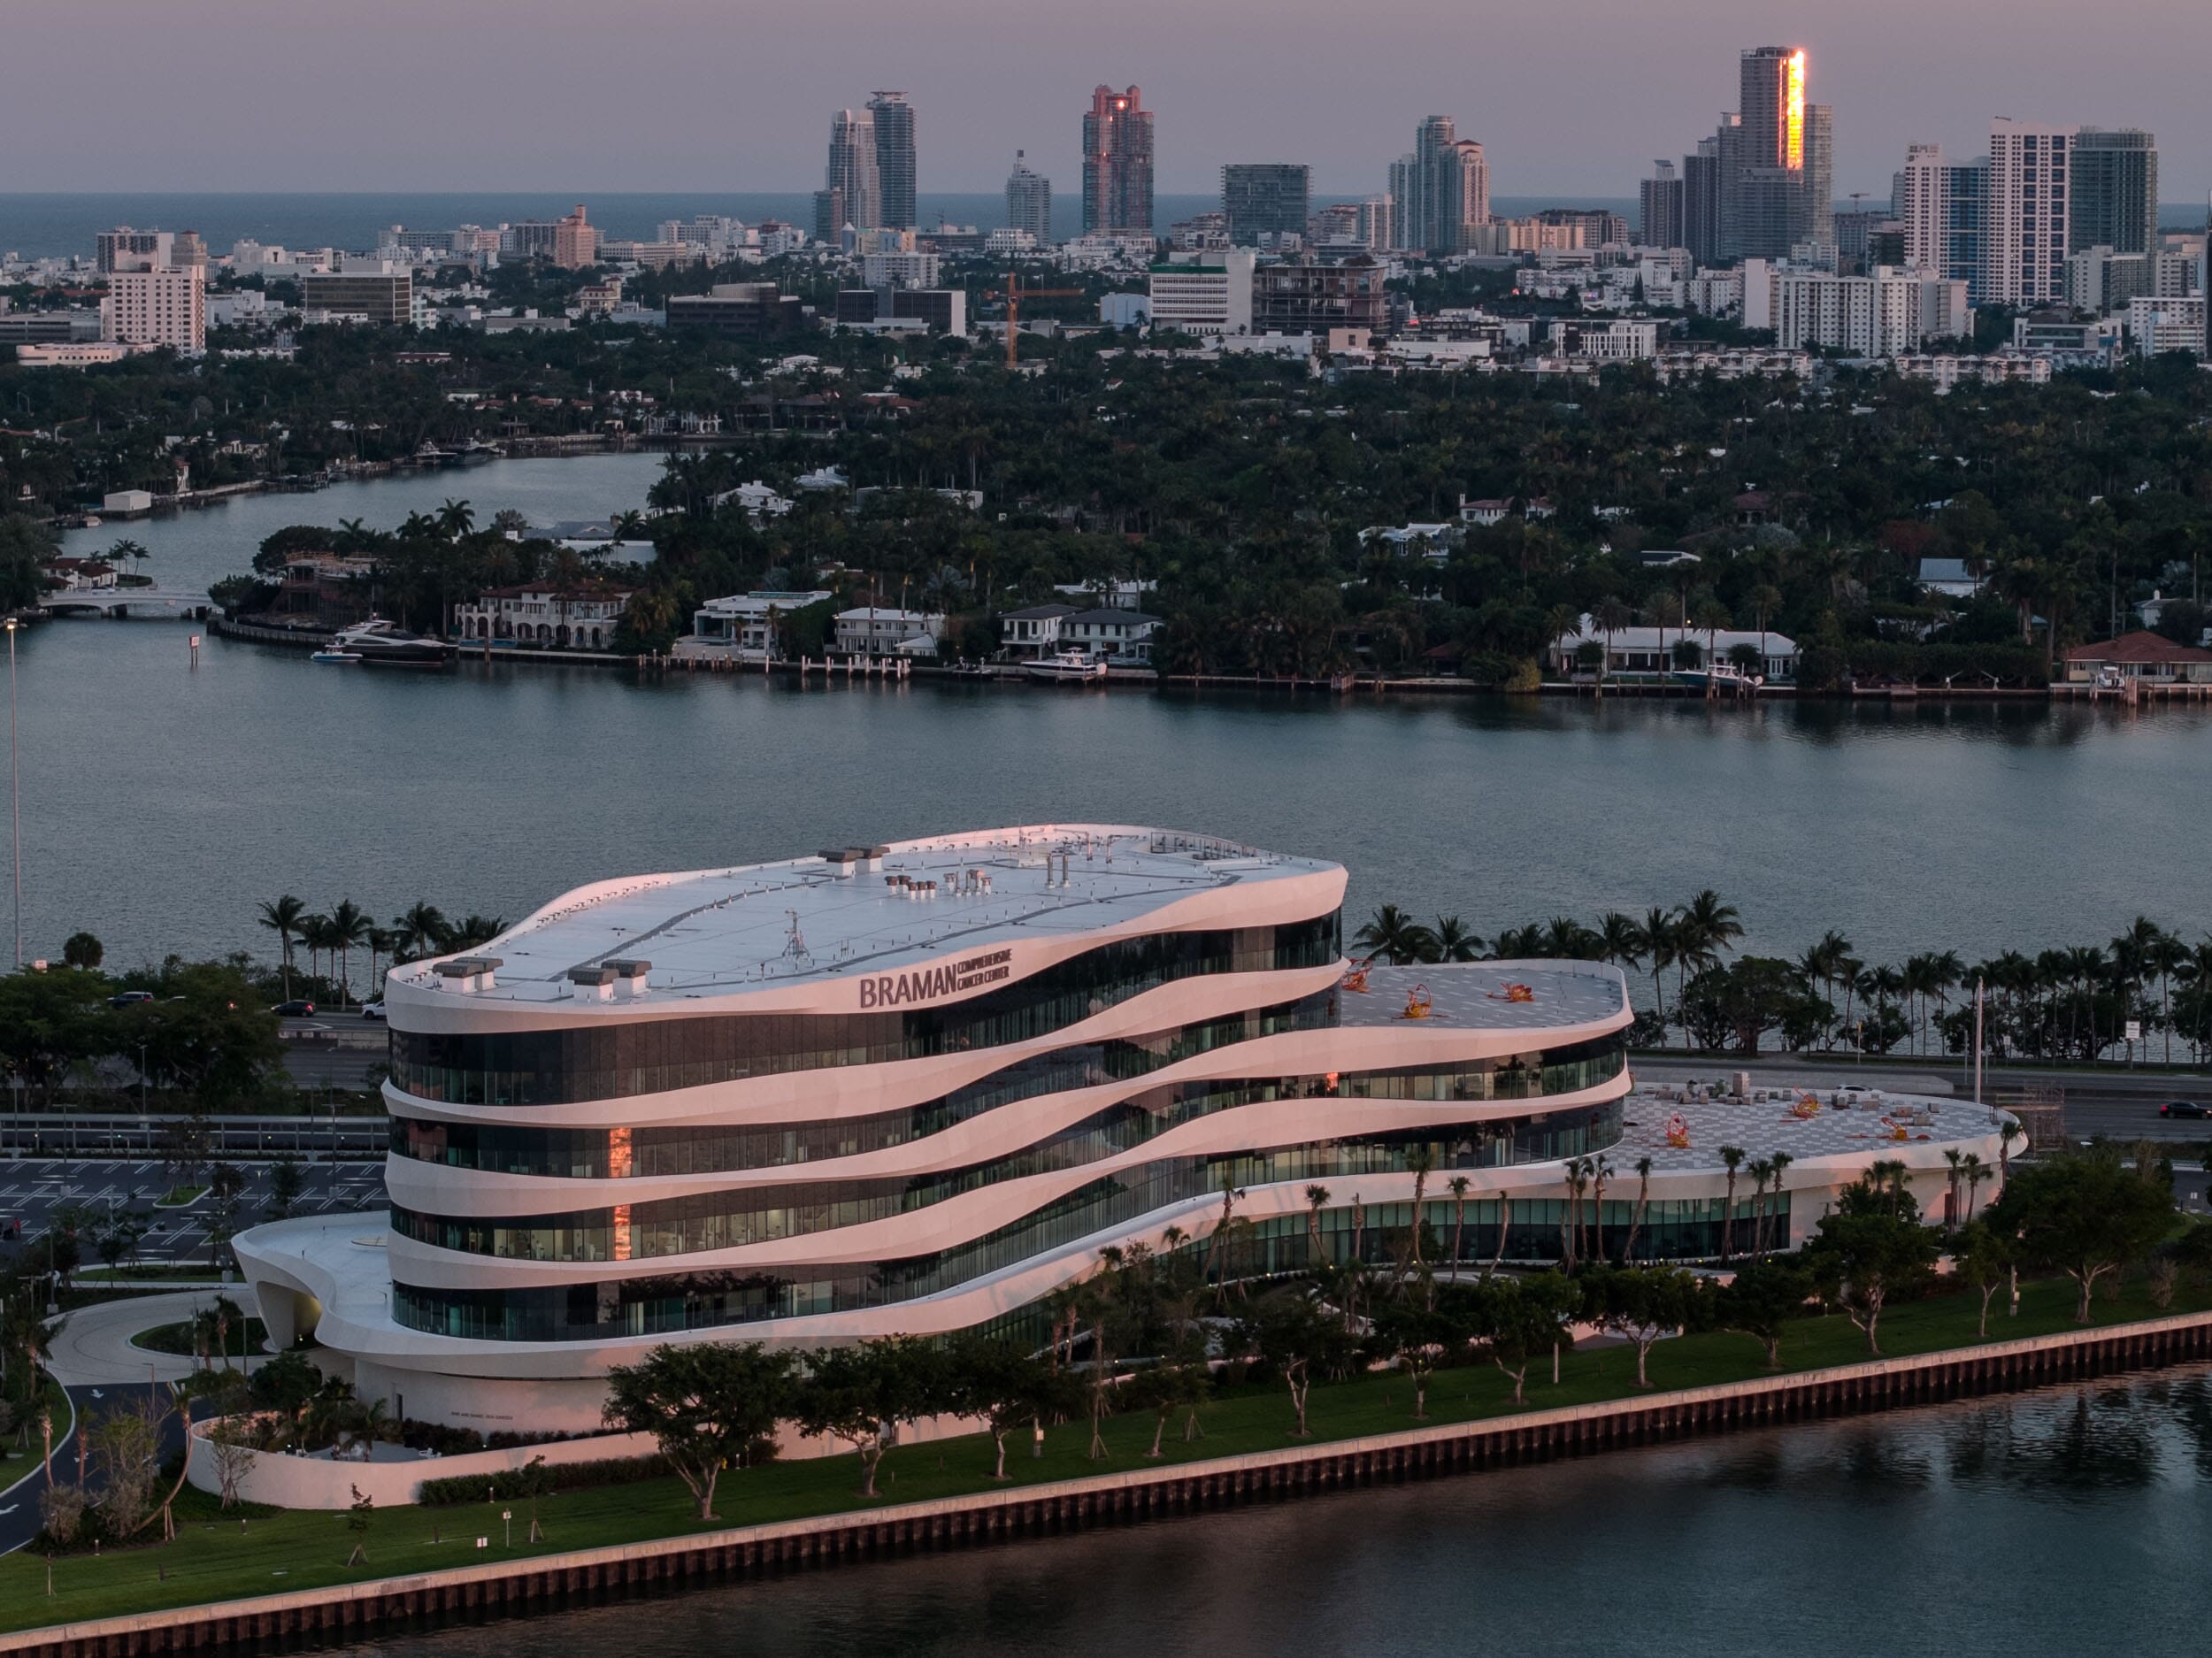
- Hiding the Parking Garage: Right next to this beautiful building is a messy municipal parking garage that was ruining my wide shots. By switching to the 70mm, I could fly much closer. Because I was tighter to the structure, I let the building’s own massive, projecting concrete curves act as a shield. The building literally blocked out its own ugly neighbor, keeping the focus entirely on the architecture.
- Perfect Proportions with Zero Stress: Unlike the nightmare curvature I had to fight on the 168mm, the 70mm kept the building completely true to form. There was almost zero distortion to fix in post, so I knew the lines were 100% accurate to the blueprints.
- The Sky Advantage: It also gave me the perfect framing headroom at twilight. It captured a deep sky gradient melting from the orange glow of the windows up into a rich, violet evening sky.
3. The 28mm Dilemma: Clean Single Shots vs. Overkill Resolution
The 28mm is the main camera on the Mavic 4 Pro, and it has an incredible 100-megapixel sensor. The image quality, contrast, and colors are unmatched. Knowing that a single 100MP file is already more than big enough for a massive print, you have to ask yourself: Why not just fly the 28mm closer to the building, get the exact same tight framing, and call it a day?

To keep my lines straight with the wide lens, I flew the drone up to the exact mid-height of the building and kept the camera perfectly level at a 0° pitch so the columns stayed completely vertical. From a pure, distortion-free standpoint, using the 28mm is technically the cleanest way to shoot. If you want to expand the frame slightly, you don’t need a massive, complicated stitching arc—because the lens is so wide, you just keep it in landscape mode and grab a quick 2 or 3-shot panorama.
Theoretically, using the 70mm to shoot a multi-frame pano over that same exact area does pack more pixels into every square inch of the facade, giving you a higher-resolution file overall. But honestly, how often do you actually need that extra resolution? Hardly ever. The 100MP sensor on the 28mm already gives you all the detail you could ever want.

4. The Final Verdict: Wide-Angle vs. Telephoto View
So, which approach actually looks better? It’s a battle between wide-angle perspective and telephoto flattening.
If you use the 28mm main camera, you get the absolute best technical file with zero software stitching headaches. But because it’s a wide lens, you get foreshortening—the parts of the building closest to the camera look way bigger than the far edges, and the background drops away and looks tiny. It creates a much more aggressive, dramatic look.

On the other hand, stepping back and shooting a panorama with the 70mm lens gives you the look architects usually prefer. By using a longer lens from further away, you eliminate that wide-angle stretching. The building’s proportions are compressed into a beautifully balanced scale, and the background feels connected to the scene. It looks premium, expensive, and true to the design.
The Ultimate Takeaway
It comes down to knowing your end-goal before you pick your lens. The 28mm main camera is unequivocally the best capture device on the drone. If your absolute priority is crisp texture clarity in a single shot with zero distortion, lock it into the 28mm and just fly into position.
But if your goal is to eliminate intense background noise and get that beautiful background compression that honors the true proportions of the architecture, look past the raw spec sheet. Back the aircraft up, and build a quick panorama with the 70mm.