Introduction:
The real estate photography tips & photo ideas detailed here will help you improve your craft and make selling your services a breeze. If you implement my tips in your photography, you can quickly create a professional and presentable portfolio of your work. Your eye-catching gallery will then attract buyers, and you’ll get preference over your competitors.
Beautiful and clear photographs play a decisive role in real estate.
According to a 2019 Redfin study, professionally photographed homes were up to 20 percent more likely to sell. Also, they sold for a higher price—up to $11,000 more—and sold 35 percent faster compared to homes that weren’t professionally photographed.
The primary goal of this article is to help you learn the essentials for creating professional-grade still photographs. To help you achieve this objective, I will guide you through the essential tools that you need for your business. In this blog post, I will guide you through the best practices when shooting a property listing. I will also walk you through the editing phase, including the essential software needed to edit and retouch photos and deliver images to clients.
I will then proceed to business tips that will help you grow. I will discuss pricing and the need for contracts. Finally, I will provide a comprehensive list of additional real estate media types that you should be offering to your customers.
Real Estate Photographer’s Toolkit – The Essentials
a. Use a Tripod
With a tripod, you can take photos at low shutter speeds. A tripod also stabilizes the photograph and prevents a blurry image, so you get images that are sharp. When you use a tripod, you can link up professional flash accessories and bring out the original colors of the home décor and structural surfaces.
b. Use a Camera Capable of Shooting Brackets
This is one of my top real estate photography tips. The key to getting the best results is to capture the correct exposures. Let me explain.
Exposure bracketing involves taking a series of identical photos at the same aperture but varying shutter speeds. A fixed aperture keeps the depth of field constant. However, changing the exposure permits you to capture well-exposed photographs for different photography lighting levels at the subject home.
c. Use Wide-Angle Lens
A great photo will show a potential home buyer as much of a room as possible. With a good wide-angle lens, you can make this possible even if there are space and light constraints.
A wide-angle lens has a significantly smaller focal length compared to a standard lens. This simply means more area of the subject room is covered in the shot. Wide-angle lenses of the following focal lengths are perfect for real estate photography:
d. Use a Tilt-Shift Lens
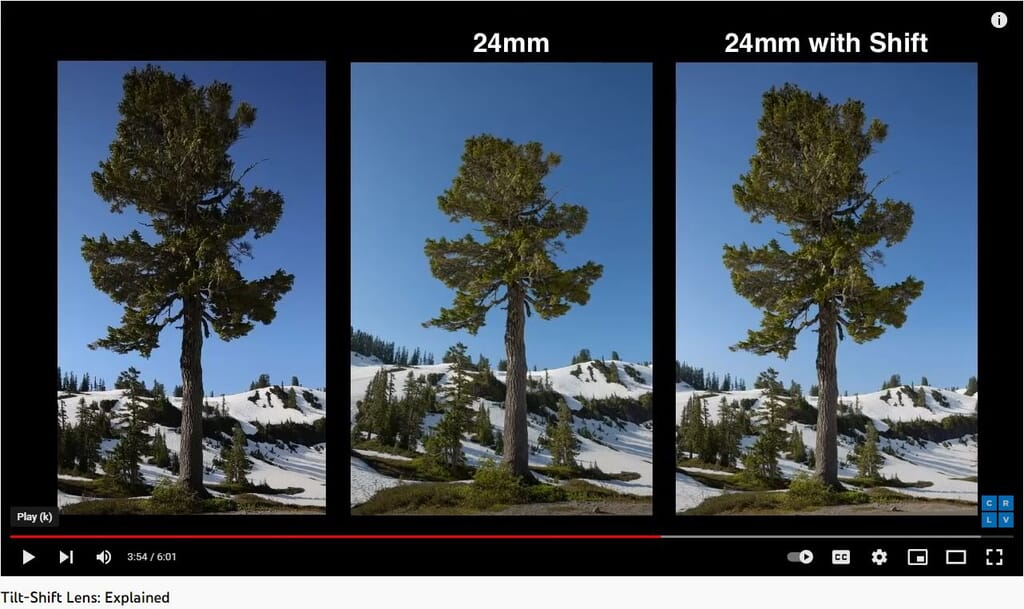
A normal lens captures a circular image. However, since the image is projected onto a rectangular sensor, a rectangular photo is rendered. The imaging circle of a normal lens is fixed in relation to the position of the camera’s sensor.
In a tilt-shift lens, you can change the imaging circle’s position, as shown in the image below (24mm with shift). When you tilt the lens, the center of that imaging circle is changed, which in turn straightens the lines that seem to converge in the distance (as seen in the middle image).
The position of the camera body remains constant. But the tilt shift alters the perspective of the lens. This feature gives a great advantage to real estate photographers. For instance, straight walls may look crooked because of the perspective of a normal lens. But a tilt-shift lens will change that perspective, making the walls look straight as they originally are.
e. Use a Drone for Aerial Shots
Aerial photographs allow a potential buyer to get a bird’s eye view of the property. They also get a better understanding of its dimensions and the neighborhood.
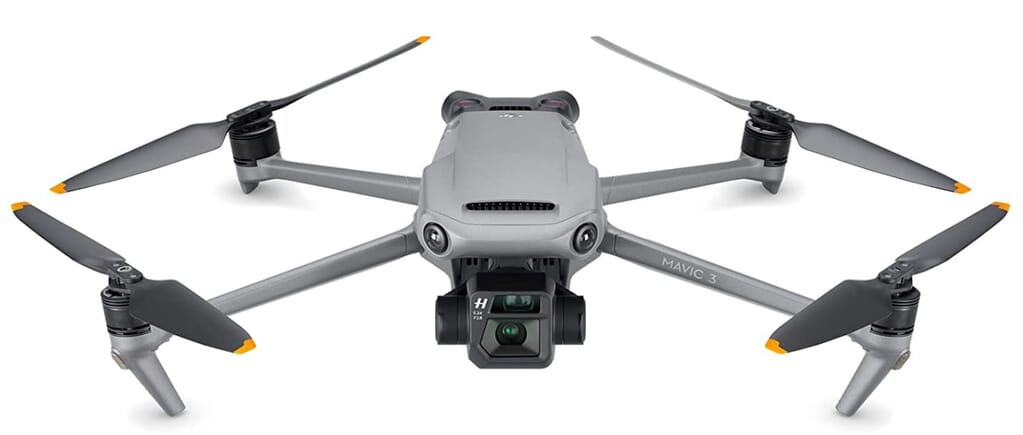
The DJI Mavic 3 is a photographic powerhouse. Its image bracketing capability is especially useful for real estate photographers. Another useful feature of this foldable drone is it supports the raw image format. Also, if you use HDR (High Dynamic Range)—more on HDR later—your drone photographs will match your interior shots more closely.
f. Use a 360 Camera for Virtual Tours
A 360 virtual tour gives a buyer a fuller picture of the home they intend to buy. In a post-pandemic market, a 360 virtual tour is all the rage because it gives a potential buyer the option of skipping an in-person open house.
The main advantage of 360 real estate photography is it adds a real-world touch. Digital images are combined to create a delightful and fully interactive experience of a home. It’s a highly effective way to present a home for sale or rent online.
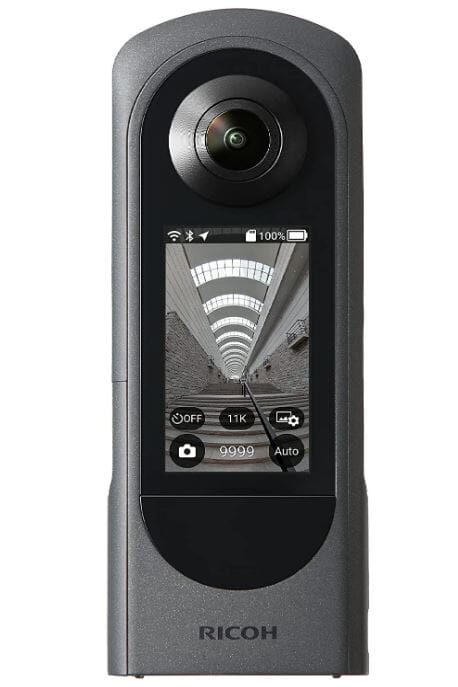
The Ricoh Theta X, a perfect workhorse, is a high-precision virtual tour camera. A removable battery, a large touch screen, and a MicroSD slot are just a few of its user-friendly options.
g. Use a Mobile Phone to Scan Rooms for Floor Plans
A floor plan captures the correct dimensions and layout of the property. It may represent a single room, one floor of a building, or a whole building. This drawing also demonstrates the connection between the rooms. A floor plan adds context to the photos used to show the property’s flow.
A floor plan is a great time-saving tool as it clearly indicates a property’s flow and layout. A prospective buyer can quickly determine if a property would suit their lifestyle.
With the Magic Plan App for iPhone, you can swiftly create and share floor plans. This affordable app is lightning fast and integrates laser measuring tools for high accuracy. The easy-to-use interface allows you to measure and sketch 2D and 3D interior floor plans.

Outsource Photo Editing Services
Picsera offers photo editing and retouching, so you can focus on your business instead. Spend a fraction of the cost, time, and effort of photography with Picsera. Click here to find out more.
Real Estate Photography Shooting Tips
a. Shoot at Low ISO (100 to 400 Max)
ISO is nothing but your camera’s sensitivity to light. Your camera’s ISO (International Standardization of Organization) is used for only one purpose—to darken or brighten your images. So, the ISO setting indicates a camera’s sensitivity to light. Some standard ISO values include 100, 200, 400, and 800. You’ll also find camera sensors with intermediate ISO values—ISO 125, ISO 160, etc.
Image noise (graininess) is a problem that even professional photographers face. It can result when you shoot pictures at high ISO settings. These tiny grains or dots of color can wreck even perfectly composed images. It’s true that noise seems unavoidable. But you can tackle noise in photographs in many ways. Shooting photographs at low ISO is the most effective strategy. Hence, the lower the ISO setting, you can rest assured that the grains in your photographs will be minimal.
The base ISO setting on your camera is important. At this setting, you can take the highest quality photographs, minimizing the visibility of noise. The typical base ISO in modern digital cameras is 100. Unless you are clicking photographs in low-light conditions, it’s safe to leave the setting at the base ISO.
Shoot at low ISO to eliminate noise. However, you’ll need to adjust the shutter speed to provide proper exposure to get the highest quality photographs.
b. Shoot in Camera RAW Format
Check this one out for yourself.
Set up your tripod, and capture images of a room—first in jpeg and then in RAW. Take both the images into Adobe Lightroom. No comparison, hands down. You’ll quickly see why every professional real estate photographer shoots RAW.
When you capture photographs in jpeg format, the camera makes all the decisions—exposure, sharpness, color, saturation, etc. These elements are then baked into a file, and you get a readymade photo. That is, the camera corrects the finished photo automatically. But with a RAW file, all the data comes directly off the sensor. You make all these decisions and finish the photo yourself. The RAW format also gives you more flexibility in the editing process.
The only drawback of RAW files is they are two or three times as large as JPEG files. But with the sharp fall in the price of hard drives, file size shouldn’t be an issue.
Worried your RAW files will be redundant in 10 or 20 years, and all your real estate photography efforts will be pointless? You don’t need to. In 2004, Adobe launched DNG (Digital Negative), an open source, lose-less RAW format. With this format, you can edit your RAW files 10 or 20 years in the future.
c. Shoot One Frame within Each Room with a Gray Card or Color Checker
A gray card helps you to get your color right because flashes are not always accurate. With a gray card, you can also accurately set the white balance within the editing phase. When you use a gray card, your images will show the true colors of the property. This can be especially useful for rooms that have unique lighting, dark ceilings, or light pastel colors.
Gray cards eliminate the guesswork out of color accuracy. You don’t need to click on different points of an image to find that perfect spot. You now have a broad target that will show you the correct color in a single click. When you edit a photo in Lightroom, you may not always remember the actual colors in a home. Using a gray card will solve that. Just shoot one frame within each room with a gray card.
d. Ensure the Rooms Are Bright and Well-Lit
For an easier workflow, use natural light and keep all interior window shades open. People love the way sunlight illuminates a room. It’s fascinating and magical. As the light pours over different surfaces, the edges of furnishing upholstery glow, wood detail shines, and metal fixtures gleam. Natural shadows of various objects convey a sense of depth.
Keeping all these points in mind, capture photographs that emphasize the top features, such as how much natural ventilation is available or how much natural light enters the room, how spacious the room is, or a unique design that would pique a potential buyer’s curiosity. A naturally-lit photograph gives a buyer a real feel of what it’d be like to see the home in person.
e. Eliminate Camera Shake
This is another one of my top real estate photography tips because a camera shake can result in grainy, blurry photos. Even accomplished photographers have difficulty eliminating camera shake. That’s the reason I suggested using a tripod right at the beginning of the article. Therefore, shooting on a tripod is the obvious solution to eliminate camera shake.
The main advantage of using a tripod is it will make a decisive difference to your photographs, especially if camera shake has been a persistent issue. Remember, even your hand can be a source of camera shake. But when you use a tripod with a Remote Shutter Release (RSR), you can eliminate camera shake altogether. A remote shutter release makes it possible to take photographs even without touching the camera. You can buy this relatively inexpensive device at various price points.
Avoid starting out with a flimsy and cheap tripod. It will destabilize your entire real estate photography setup, resulting in needless blurry images. Start with a sturdy tripod system instead. Before you buy a tripod, assess its stability, especially after you mount a heavy camera on it.
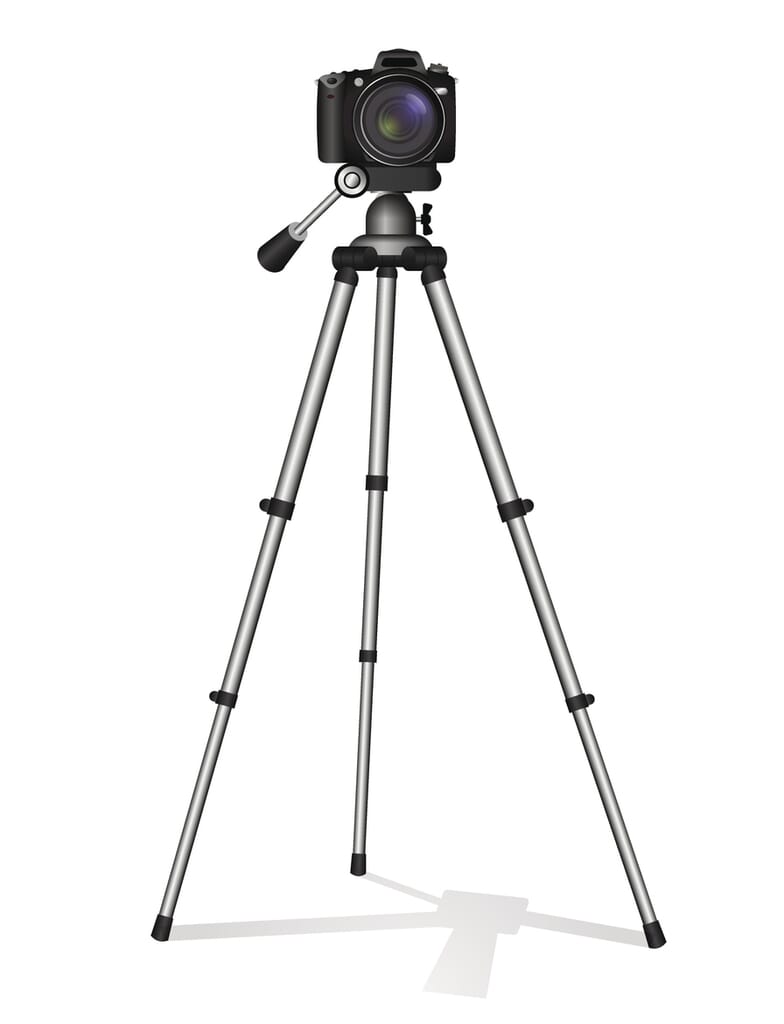
My suggestion for a great investment is a solid carbon fiber tripod. You can count on this lightweight tripod to present you with strong stability. Also, the leveling feature works well. You can use the center grip and level the tripod’s head easily.
You can also choose either in-camera stabilization or lens stabilization. While Canon and Nikon are big on lens stabilization, other camera manufacturers like Pentax and Sony have been promoting in-camera stabilization (also labeled body stabilization) technology.
You can also use a cable release to avoid camera shake. Other options include your camera’s mobile phone application to remote control the camera or the self-timer option on the camera to snap the photo.
f. Shoot Brackets to Capture Shadow and Highlight Details
I already mentioned that exposure bracketing involves taking a series of identical photos at the same aperture but varying shutter speeds. In the Autobracketing technique in HDR (High Dynamic Range) photography, your camera captures multiple photographs of the property at a time. These photographs will be clicked at different exposures and shutter speeds, only to be merged during the editing process to produce eye-catching HDR images. (High Dynamic Range is the range of the lightest color tones to the darkest color tones within a photograph.)
Set your camera to bracketing mode. Next, bracket by having your camera change the f-stops. But keep the ISO constant. Each bracket shot can have at least 5 frames. If you change the ISO setting, you are introducing noise. So, it’s best to bracket by changing the shutter speed. If you are shooting 5 brackets, you need to have one exposure that is completely neutral.
You also need to have 2 frames shot below the midpoint exposure to capture details in the windows and highlights. Have 2 exposures that capture detail in the shadow areas. The line below shows 5 frames being captured. 0 is the camera’s neutral exposure, −3 is three stops below, and 3 is two stops above the dead center neutral exposure.
-3 -1.5 0 1.5 3
Click 5 pictures with apertures ranging from −3 to 3.
g. Keep All Parts of the Frame in Focus by Shooting at f8.0 through f16
Most lenses are the sharpest between f5.6 and f8.0. But smaller apertures (f16 or f22) give a greater depth of field. If you are forced to shoot at larger apertures, then consider focus stacking. In the Focus Stacking technique, you can blend the in-focus areas of your photos to increase the perceived depth of field.
Remember, in focus stacking, you don’t increase the depth of field of your lens. You only increase the amount of in-focus objects in your photo. That is, the perceived depth of field is increased. Even if you increase the f-stop to the maximum setting, you won’t be able to cover all the objects in focus in your photo. By focus stacking, you can get the entire area in focus. You can blend the in-focus areas by simply racking the focus, shooting multiple images, and blending them together in post.
h. Always Shoot in Landscape Mode (Horizontally)
The human eye looks at the world in a 4:3 aspect ratio. Hence, horizontal listing photos can showcase a property more accurately.
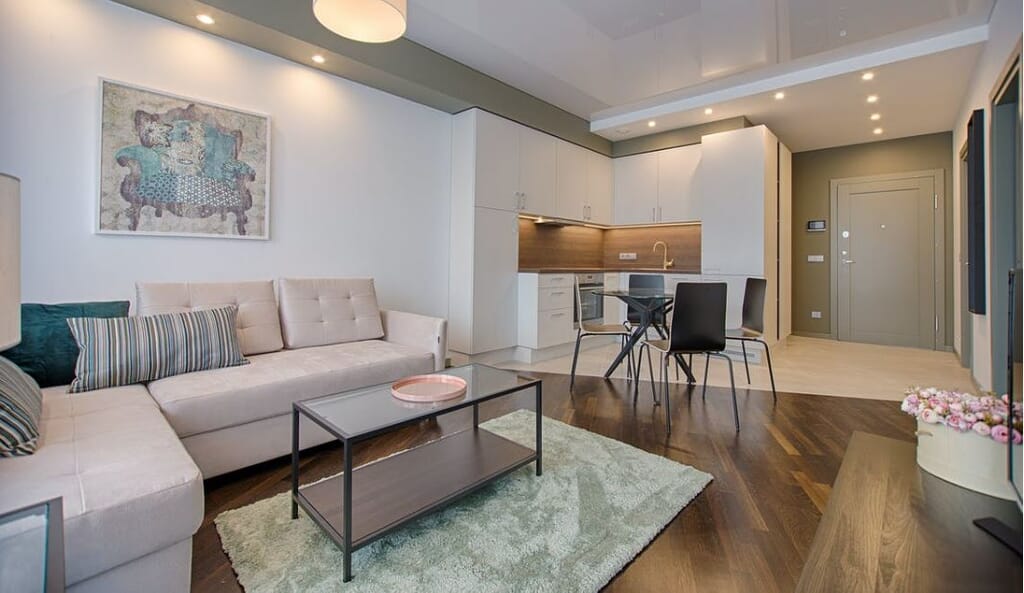
As it’s evident from the photo above, shooting in landscape mode gives a more comprehensive view. All real estate properties can be considered horizontal subjects. So, horizontal viewing is preferred over portrait (vertical) mode.
i. Use Auto White Balance and Fix White Balance Issues in Post
White balance is essentially the mood of the entire photograph. The mood can be warm, inclining toward the yellowish hue, or cold, inclining toward the bluish side. A camera has many white balance settings, and Auto White Balance (AWB) is one of them. When you set your camera to AWB, it makes its best color calculations and determines how the colors should look.
The AWB setting works out alright in most situations. But when photographing in harsh or low light conditions, AWB falls short in rendering the true colors because its main role is to remove color casts. What AWB does is it minimizes the colors resulting from harsh or low light conditions.
You can get around this issue by changing the setting to Daylight White Balance (DWB) preset on your camera. This setting has a subtle warming effect. Since harsh and low light conditions are typically dominated by warmer tones, the DWB setting will enhance those tones a bit.
If there’s no DWB preset in your camera, you can use the cloudy or shade presets. Both these settings have a notable warming effect than the DWB setting and will intensify the warm tones present in the harsh and low light conditions.
j. Keep Your Camera Angle Flat
Ensure your camera is as close to zero degrees as possible.
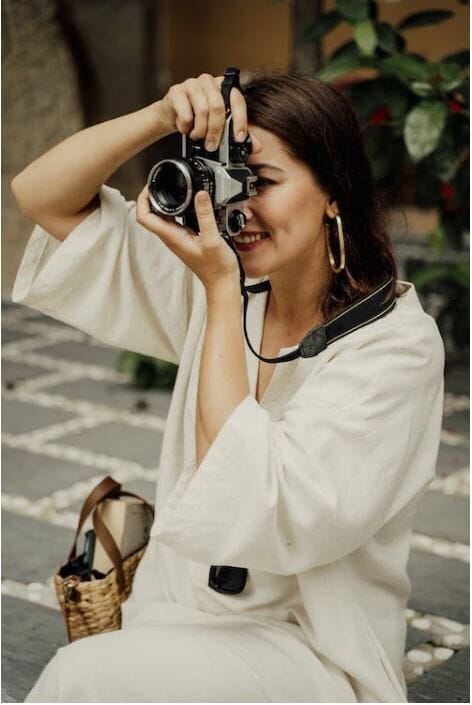
Keep the camera straight to avoid distortion. The more you tilt the camera upward, the more distortion you will see in the vertical lines. You’ll observe that the vertical lines begin to slant if the position of the camera is slightly up or down. This distortion gets worse with wide-angle lenses. Therefore, you must avoid tilting the camera even a tiny bit.
k. Take 2 Photos of Every Room
Take one center shot of every room—a straight-on view. Take a second one—an angled view, as well. Cover every room, including the bathrooms and kitchen.
When taking photos of the living room, show the wall that is the focal point of the room. If the view of the outside from the room is great, include it in the photo. Similarly, when taking photos of a bedroom, show the wall that the headboard of the bed is placed against. Once again, if the view of the outside from the room is terrific, include it in the photo.
When you take photos of the kitchen, focus on the area slightly above the counter. And when you take photos of the bathrooms, focus on the area slightly above the counter but stay below the mirror.
l. Make Sure the Room Is Clean and Tidy
Before you take photos, prepare the property. Clean the house and remove clutter. Keep personal objects out of sight. The most impactful change, however, is to stage the home.
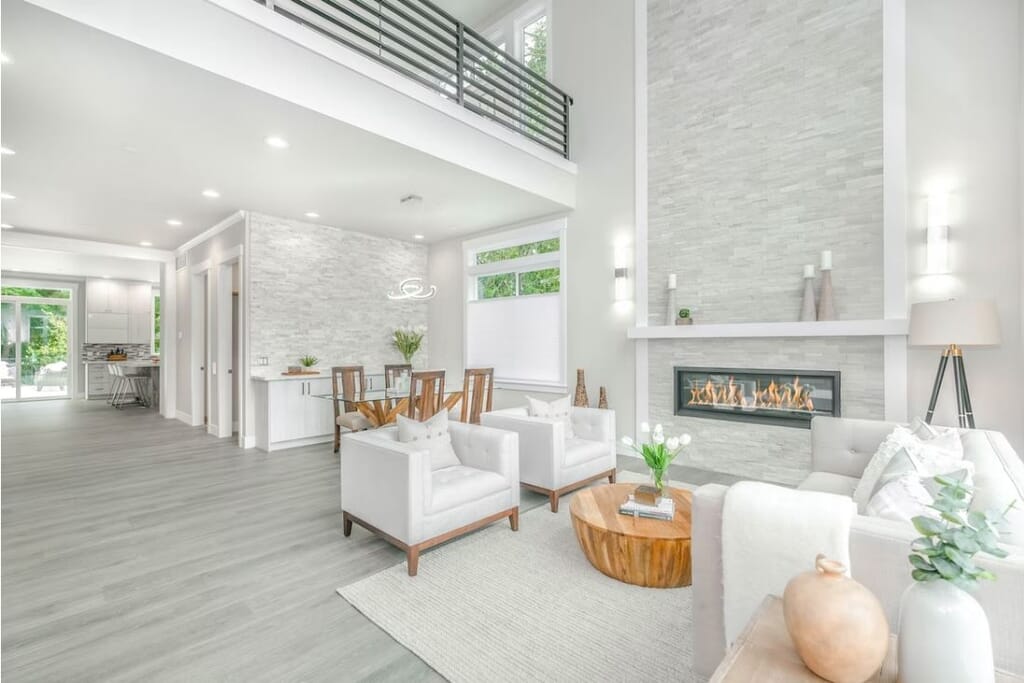
m. The Camera Height Should Be at Eye Level
Aim to capture more floor than ceiling. The right perspective would be shooting from a height of around 5 feet off the ground. Keep the camera at eye level, taking care to avoid strange tilting angles. Take lifelike images so that potential buyers aren’t confused during their on-the-ground visit. Just make sure your photos of a property are as close to what they’ll eventually see with their own eyes.
n. Ensure the Composition Is Well-Balanced
Use your camera’s framing grid and make the bottom ⅔ of the frame (floor and furniture). It’s best to capture more of the floor than the ceiling in your photo because flooring is a huge selling point. Avoid tilting your camera, and make certain all the lines in a room are perfectly straight. Take photos of a room standing in the doorway. This will make the room seem more open and larger than it is.
Select the right height to capture both the furniture and ceiling. Remember, even a slight error will make a room seem disproportionate.
o. Prepare a Shoot List
This is yet another one of my top real estate photography tips. For a typical single-family residence, your shoot list would include:
- Living Room – 2 frames (straight on + angled views)
- Kitchen – 2 frames (straight on + angled views)
- Bedrooms – 2 frames (straight on + angled views)
- Bathrooms – 2 frames (straight on + angled views)
- Exterior Front – 2 frames (straight on + angled views)
- Exterior Rear – 2 frames (straight on + angled views)
- Laundry Room – 2 frames (straight on + angled views)
- Garage – 2 frames (straight on + angled views)
p. Highlight the Best Feature of the Room or Area
When you photograph a home, it’s important that you highlight its uniqueness. It’s equally important to downplay the flaws.
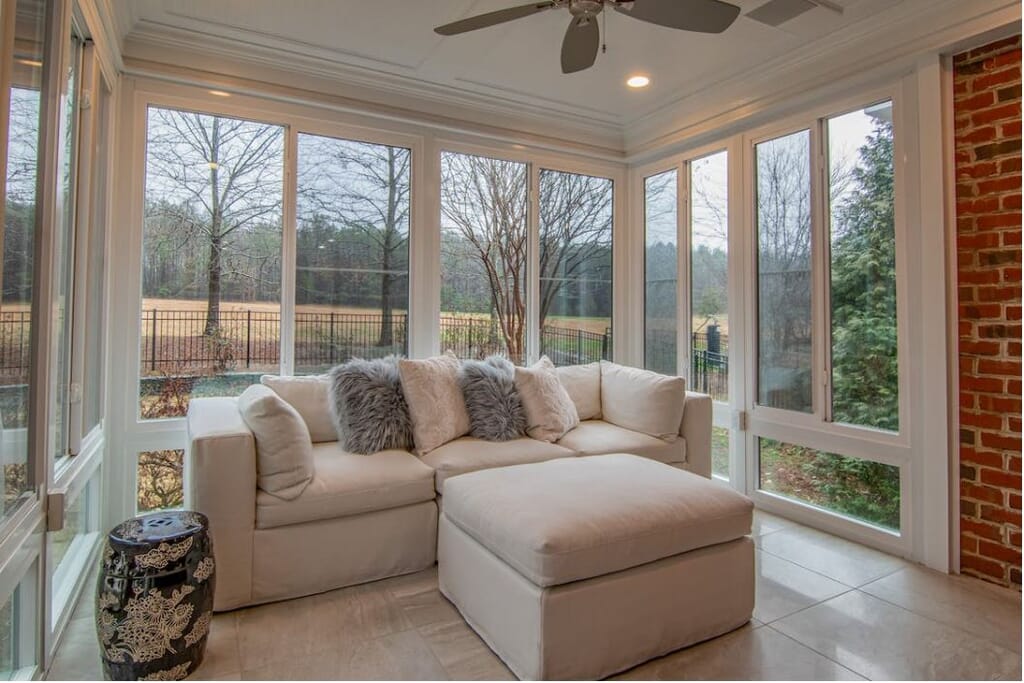
Capture photos of large windows, impressive staircases, built-in shelves, built-in wine refrigerator, and custom cabinets. But don’t take photos of a dated staircase, incomplete basement, or overgrown hedge. Speak to the owner about the best features of their property on which they spent extra money. Make sure you highlight these features in your photos.
q. Complete the Photo Shoot Even When Conditions Are Not Ideal
Don’t panic or get too stressed if the shooting conditions aren’t perfect. Post-processing software can improve the quality of your photos and even enhance certain parts. Let’s say you encounter a cloudy day with an unfavorable sky. There’s nothing to worry about as you can replace the sky in post-production. Likewise, if the grass looks dry and lifeless, you can make the grass look greener in editing. And if you don’t have a tilt-shift lens, you can correct vertical distortions in the editing stage.

Photography Coaching Via Zoom
Have the right tools but don’t know how to properly position your apparel? Get access to the basics, tips, and secrets to taking picture-perfect apparel shots with Picsera’s Photography Zoom Coaching. Click here to find out more.
Real Estate Photography Editing Tips
a. Develop Your Signature Editing Style
Developing your own signature editing style is an integral part of becoming a professional real estate photographer. Do your best to match this style from shoot to shoot. Your customers are hiring you for a specific look, so do your best to be consistent from shoot to shoot. Real estate photographs need true-to-life colors, and most property images look best with bright, bold colors. White ceilings should be as close to white as possible, with a slight warm tone.
Determine how punchy and saturated you want your green grass and blue sky to be. Match those colors from shoot to shoot, even when faced with a variety of lighting conditions. Use the same color profile within your RAW file converter (Lightroom, Photoshop, and Capture One) from shoot to shoot in order to maintain color grading consistency.
A profile is a set of instructions used to render a photo, converting it from raw camera info into the colors and tones that a viewer sees. Every raw image must have one profile applied. (In fact, it can have only one profile at a time.) Shown below is a screenshot of six Adobe Camera RAW profiles:
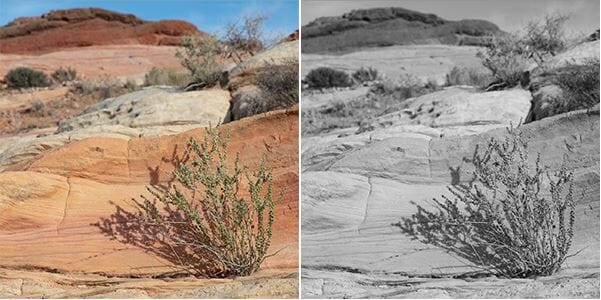
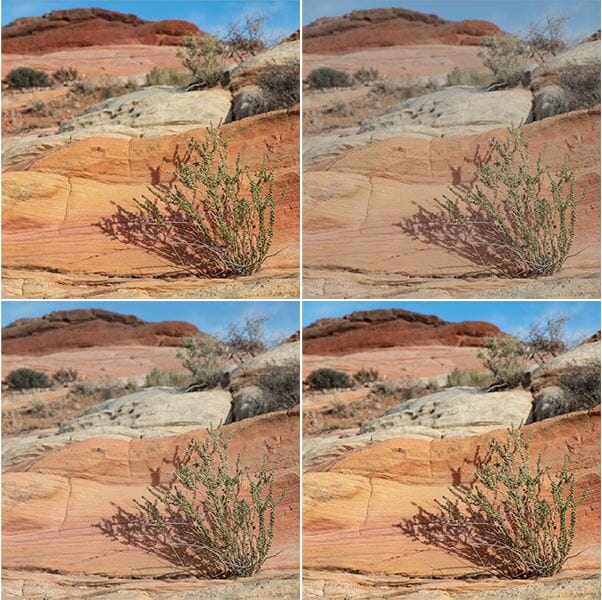
The six profiles are Adobe color, Adobe monochrome, Adobe landscape, Adobe neutral, Adobe portrait, and Adobe vivid. Consider how much detail you want to show in windows when capturing interiors. Are you looking for a more natural look that shows brighter windows with less detail? Or are you choosing an HDR look with darker windows and more exterior details?
b. Aim to Achieve a Rich Tonal Range
Set white and black points to achieve a rich tonal range with good contrast throughout the image. Pay attention to the histogram in order to prevent too much clipping of whites and blacks within the shadows and highlights.
c. Straighten Tool
Use the straighten tool to ensure you have straight horizons.
d. Fix Distortions
Fix the vertical and horizontal line distortions, which are more noticeable in images shot with wide-angle lenses.
e. Apply Lens Corrections
Apply lens corrections to remove distortions and fix perspective issues caused by your specific lens.
f. Bracketing
If shooting brackets, use between 3 and 5 frames to capture a full tonal range image.
g. Edit Sky Color
Make dull or white sky blue either by playing with saturation and luminance levels or by doing an outright sky replacement in Photoshop.
h. Edit Grass Color
Improve green grass either by replacing grass in Photoshop or adjusting the level of green saturation in Lightroom.
i. Match Colors
Look for mismatched colors in draperies or carpets and use the brush tool to get them to match as closely as possible.
j. Outsource Your Photo Editing Work
Post-production can be time-consuming and exhausting. The simplest way to enhance RAW photos naturally is to outsource to professional editors. This is the best option if you are short on time or don’t have the technical skills to make your images look professional. Click here to get a quote.
You can use the time you save to plan new photo shoots, develop new marketing strategies, and find new customers.
Real Estate Photography Business Tips
a. Pricing Considerations:
i. Size of the Property
The size of the property is a huge factor. A 5,000 sq. ft. mansion will take you much longer to shoot than a 500 sq. ft. studio apartment. You can offer a real estate photography pricing package based on square footage. But take into consideration the number of photos you deliver. The more photos you provide to the client, the higher your price should be.
ii. Driving Distance to the Property
Consider the distance you’ll need to travel. For instance, if you have to travel 50 miles from your residence to the shoot location, charge an extra $100 for roundtrip expenses. But if the shoot location lies within your service area, you may waive the travel fee.
iii. Commercial vs. Residential Shoots
Commercial shoots have higher budgets, and you can typically command higher rates when shooting for developers, architects, and designers. Also, keep in mind that a residential property will take a lot less time to shoot compared to a multi-story commercial building.
iv. Photography Gear
The price of your photography gear is an important factor. If the camera and lenses you use are low-end, then charge the market rate. But if you are shooting with medium format bodies and high-end lenses, you’ll need to price accordingly. Educate your customers on the difference in image quality that these pricey cameras and lenses deliver. Ideally, your portfolio should say it all.
v. Create Flat Rate All-Inclusive Packages
Don’t charge hourly. Meet with your customers and prospects regularly and look for common requests. Create packages that solve your customer pain points and price modestly. This is the best business strategy to create repeat customers.
vi. Charge More for Twilight/Golden Hour Shoots
Twilight/golden hour is a popular time of day. The light is best at this time, and you only get two chances in a day—the first one at sunrise and the second one at sunset. You must charge more for these shoots because you have to shoot the property in a specific time window. You also have to plan for this type of shoot in advance. For example, you could photograph the interior of the property in the afternoon when natural light is at its best and return well before the golden hour to shoot the exterior.
b. Contractual Agreements
A contract is an essential component of your professional relationship with your customer. Always define your terms and conditions in a contract and get the customer’s signature and deposit before committing to a shoot date. This will reduce payment conflicts and help protect your intellectual property after the work is delivered. A contract can also protect you in the case of disagreements.
c. Add on Services
You can’t think of yourself as simply a real estate photographer in this day and age. Instead, think of yourself as a visual content creator who excels at everything from taking still photos and shooting videos to creating Instagram reels and stories that showcase properties as well as real estate agents selling them.
Buy a 360 camera and learn to create 360 virtual tours. Capturing 360 images is relatively simple, and 360 cameras have come down in price quite a bit over the last couple of years. Let me give you a practical idea. With the Asteroom 3D Virtual Tour Real Estate Kit ($119.99), you can convert your Smartphone into a 360 camera.
Discussed below is a comprehensive list of additional real estate media types that you should be offering to your customers.
i. Aerial Real Estate Photography
Location, location, location is what every savvy real estate investor thinks of first when contemplating a property to purchase. Aerial photography enables a potential property buyer to get a quick idea of the location and surroundings. Rather than have someone leave the property listing to go to Google Maps, you can increase engagement and the chance of getting a conversion by providing a marked-up aerial photograph of the key landmarks in the area and the property’s proximity to those places.
Aerial real estate photography enables buyers to appreciate the scale and egress of a property, the footprint of the building on the land, landscaping, and any natural surroundings on or near the property, such as lakes, oceans, and mountains. As a real estate photographer, owning a drone is no longer a nice to have, but it’s a need to have.
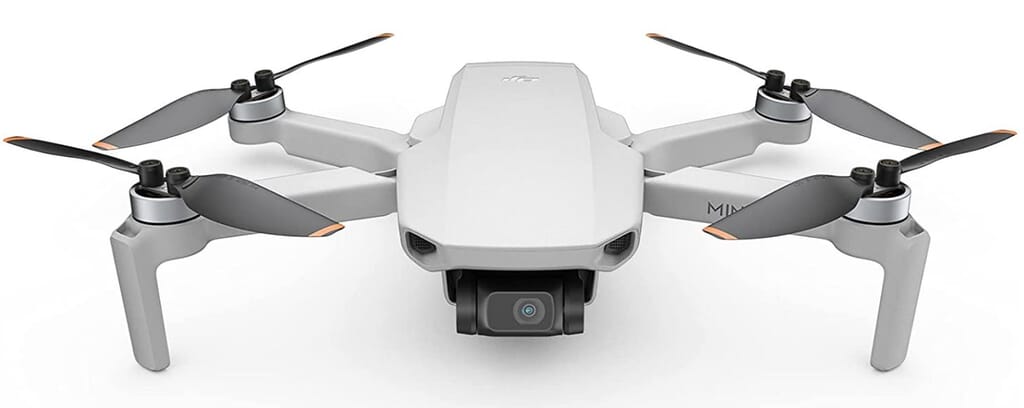
The DJI Mini SE ($245.99) is a lightweight camera drone that has superior camera stability. This drone is extremely stable and reliable. Flying it is a breeze, and it’s quiet as well.
Real estate agents are demanding photos taken from high above the ground, especially those serving the high-end residential market. The typical residential photography shoot in the US goes for about $155 to $175 for about 30 still photos. But if you have a drone, you can raise your fees by a minimum of $100 per shoot by simply delivering an additional 10 aerial photos.
ii. Floor plans
Floor plans, like aerial photos, give real estate buyers the answers to some key questions in a matter of seconds. Before a buyer invests time to visit a property, they want to know the size and location of rooms and the distance between them. The larger the property, the more important it is to offer a floor plan as part of the property listing. And as a real estate photographer, you no longer need to know how to draw or create sketches to create floor plans.
You can use a Smartphone and a mobile application such as Magic Plan to scan a room in a matter of seconds. The app will create a 3D model of the room and take all of the measurements. Once each room is separately scanned, it takes an extra 15 to 30 minutes to place each room into one cohesive floor plan. Or, more expensive solutions such as Matterport will scan an entire property and create a floor plan automatically. Photographers who provide floor plans are increasing their base fees by as much as $50 to $200, depending on the size of the property. You must seriously consider offering floor plans as an add-on service.
iii. Virtually Staged Images
Virtually staged images are the most cost-effective way for property sellers and real estate agents to help potential buyers understand how large a room or space really is. While floor plans answer the technical questions (square feet, number of rooms, sunlight exposure, etc.), a virtually staged room helps non-technical people visualize how much furniture fits inside a space. Buyers want to confirm if their furniture will fit inside the property, and Virtual Staging makes it easy for them to do so. In addition, empty rooms are unattractive and cold.
Virtual staging brings warmth and excitement to any property. Every real estate photographer near you should offer virtual staging to their customers because agents and property owners are demanding it. Photographers can use online platforms such as Apply Design to upload an image of an empty room and then quickly add furniture to it all via a web browser. Or, you can outsource virtual staging to professional 3D designers who can handle the entire process for you. The price for outsourcing a virtually staged image can be as low as $10.00 per room, and real estate agents are paying up to $100.00 for one staged image for luxury residences.
iv. Video Walkthrough
While a property video does help sell the property, the main reason to create real estate video walkthroughs is to showcase your creativity and your brand. Even if you aren’t a videographer, use your Smartphone to record a short video of each property you photograph and then promote yourself with an Instagram reel or story, with TikTok, or even a paid ad on Facebook with a low budget of $5.00 per day. And if you’re not already selling video as part of your packages, getting into video should be relatively easy as most modern DSLRs and mirror-less cameras are capable of 4K high-definition video.
Editing the videos is clearly the most time-consuming part of the workflow. But video editing can be outsourced at very low rates, and the entire process of uploading your raw footage is relatively fast with today’s 5G networks and high-speed internet. For a 1- to 3-minute property video, real estate content creators and marketing firms charge anywhere from $400 to $2,000.
v. Headshots and Videos of Agents
Headshots and videos help to promote agents on social media (Instagram stories and reels, Facebook ads). Agents need to sell themselves, and social media is the best way to do so. While it’s true that agents can easily create videos using their Smartphones, the quality will rarely be as good as something produced by you—a professional photographer. Agents don’t really have the time or interest to shoot and edit their own content. They need help, and they’re happy to pay for assistance.
Hone in on your people skills and learn to lead your agent clients through a headshot session or a video interview. Spend an extra 45 minutes to an hour with the agent selling the property after photographing it, and you can easily earn an extra $200 – $300 for a 15 to 20 Instagram reel or TikTok and 5 strong headshots.
vi. 360 Virtual Tours
One positive lesson we learned from COVID-19 is that buyers can confidently purchase properties unseen with the assistance of high-quality real estate photography and 360 virtual tours. While standard real estate photos are still the most popular media type in real estate marketing, virtual tours are actually more popular than video walkthroughs. 360 virtual tours, unlike video walkthroughs, are interactive, and this is really why they have become so popular. As with a physical tour, buyers are in control of where they go when virtually touring a property. They can navigate to rooms and areas of the property that are most important to them.
Watching a video, on the other hand, is a more passive experience as the video producer ultimately controls what the viewer sees and when through the video editing process. A recent survey conducted by Realtor.com revealed that listings with a virtual tour receive 87 percent more views than those that don’t include one. And Zillow recently reported that 80 percent of millennials (the demographic that buys the most homes in the US) would like to view listings with 360 virtual tours and digital floor plans when shopping for a home.
To create a 360 virtual tour, you must first purchase a 360 camera, and you will need software to create the actual tour. Here’s a list of the 7 most popular 360 cameras for 2022. And here’s a great video describing the best platforms to build your own 360 virtual tour using the files captured with the 360 camera. And if you decide you’d rather outsource the creation and hosting of the virtual tour, you can always get help from Picsera.
Conclusion
In real estate photography, capturing perfect photos is the key. The right strategy to deliver the best images of both the interior and exterior of a property to your customers is to follow the real estate photography tips explained here.
Need help with editing photos? Let us do the work for you. Start your FREE trial today!

Picsera was founded in 2014 by David Sinai, a serious ameteur photographer who spent the first 20 years of his career working in the financial technology space. With a track record of building innovative solutions and working with offshore partners, David started Picsera to help photographers work more efficiently by enabling them to outsource their image editing. With very affordable rates and incredibly fast turnaround times, photographers from a variety of industries (eCommerce, real estate, weddings and portrait studios) enjoy larger, more successful businesses while still maintaining more time for their families, friends, and hobbies. Today, David and his team at Picsera assist all kinds of content creators with 3D modeling and rendering and video editing. When David is not working you’ll find him spending time with his family, mountain biking, or capturing landscapes throughout South Florida with either his pro cameras or drone.


