Now it’s time to sit down at the Computer!!
Editing images is an important step in creating a polished and professional-looking product shot. It’s also the key to creating a strong brand customers will find appealing. Editing is not easy. In this stage of the process, you will need to take the time to polish your images. Editing requires special programs and some specialized training. It can take years to learn all the complexities of using a program like Photoshop.
Editing requires the completion of several different steps. It’s advisable to follow a set of procedures called a workflow. This workflow involves taking steps to edit the look of your images. You may need to adjust exposure or remove elements from your images. All of this is completed through the process of editing.
About the Editing Workflow
Most edits begin with the process of culling. This means that you spend some time evaluating your images and flagging the ones you wish to edit and use for your website or promotional materials.
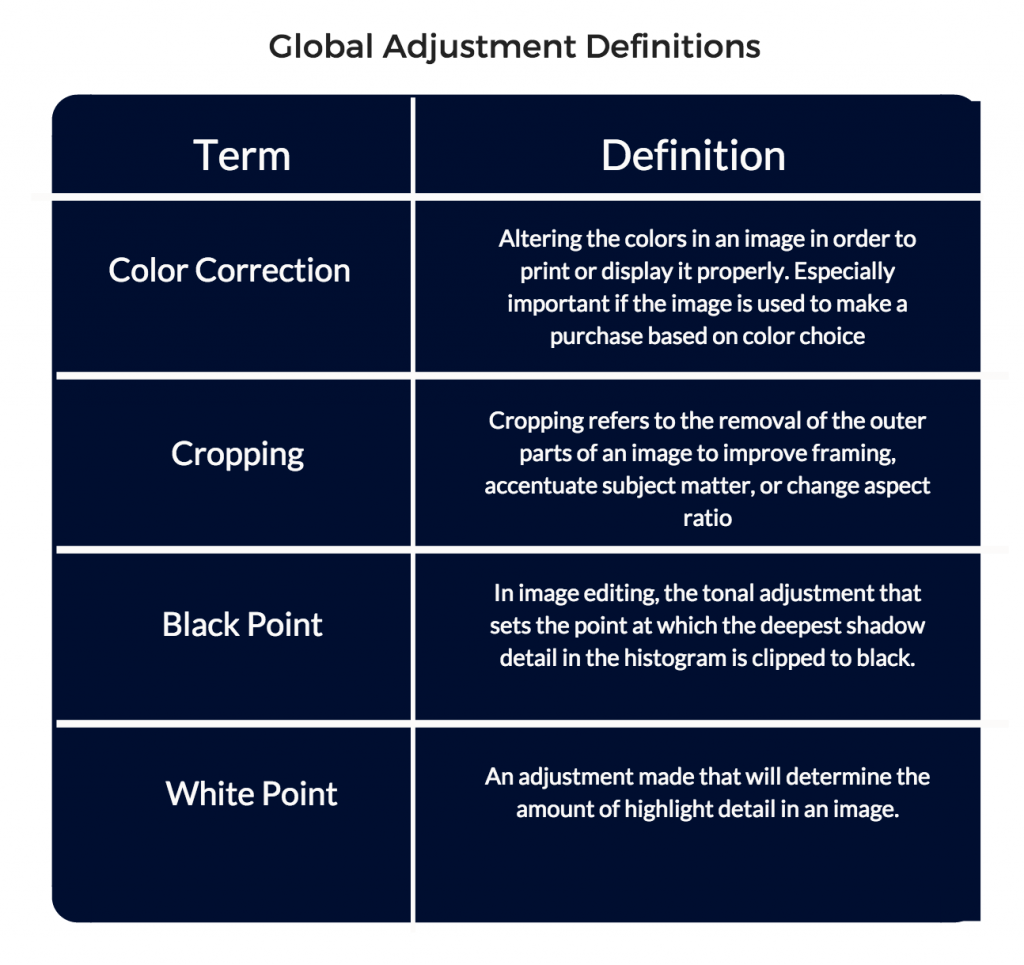
The second stage of editing involves making global adjustments to your photos. These type of edits include adjusting exposure, white balance, black and white points and cropping images. Typically, these processes are completed in order to create a uniform look throughout your product shots.
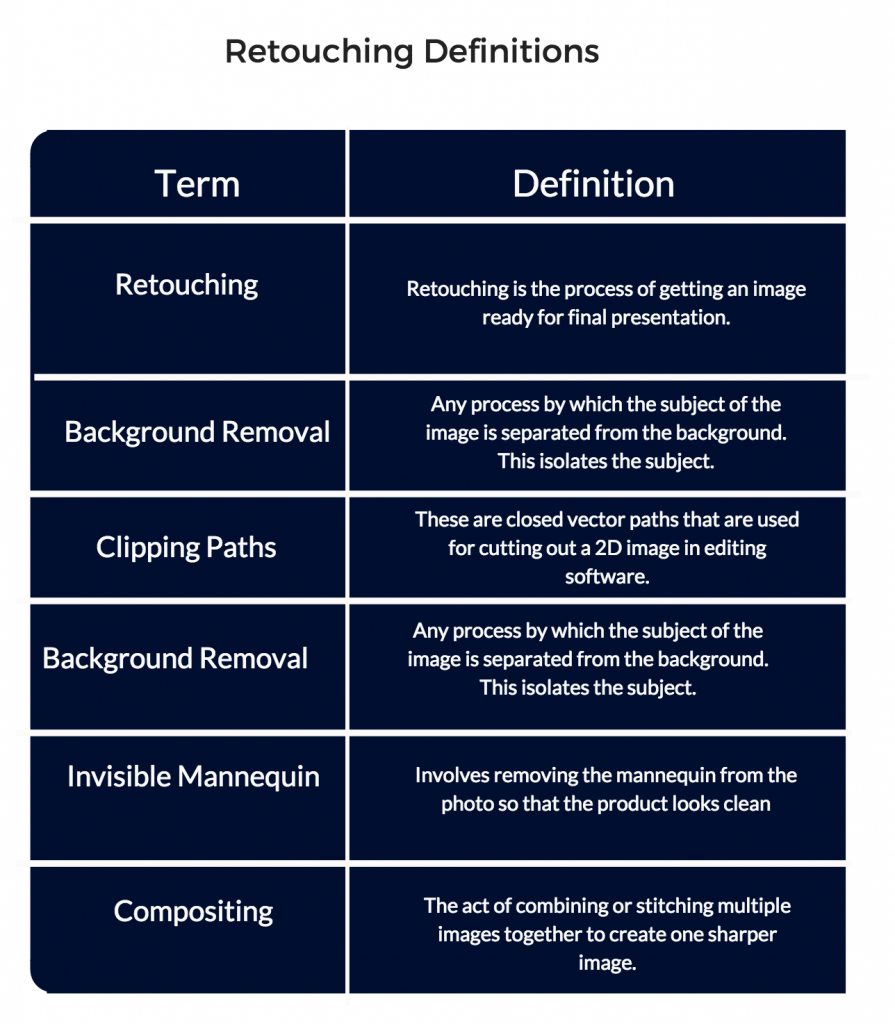
The third stage of editing involves retouching images. Here the adjustments to images are more localized and unique to each image.
A professional editor typically performs more complicated tasks like airbrushing, which smooths out blemishes in the product or model. Retouching also includes spot removal. Editors typically remove glare and reflections during the retouching stage. These types of edits usually require the use of programs like Adobe Photoshop which can be a pricier program to purchase.
Basic Photo Editing Terminology
Whether you’re editing in-house or outsourcing your editing to a company like Picsera, is important to understand photo editing terminology to understand what services you need and estimate the time and cost it will take to acquire them.
Global Adjustments vs Retouching
As you can see from these definitions, retouching is a considerably different process from making global adjustments. Retouching takes more time to complete and requires some specialized training. Retouching skills also require several hours of practice to perfect. It’s important to understand the distinction between these two types of editing procedures.
All of these photo editing processes can be outsourced to a photo editing company. Outsourcing is many times more cost effective and faster than doing it in-house.
If you are planning on placing your products on Google Shopping or Amazon, don’t forget that these companies have strict requirements for the photographs uploaded to their platforms. They know how important it is to have quality shots of each product.
Most Common Photo Editing Techniques for Product Images
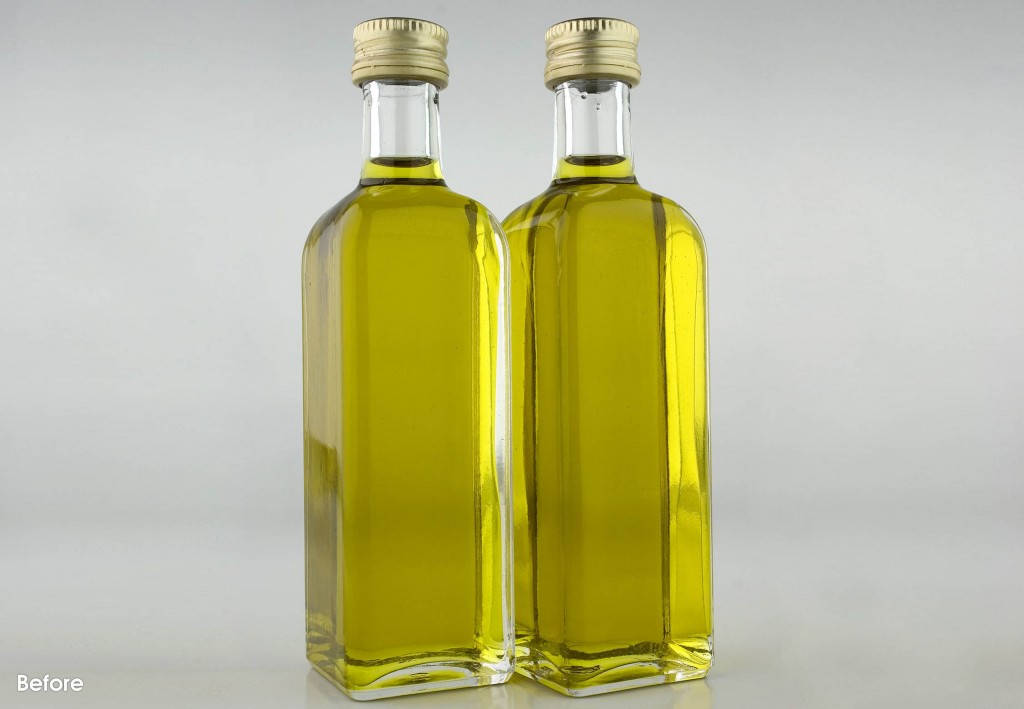
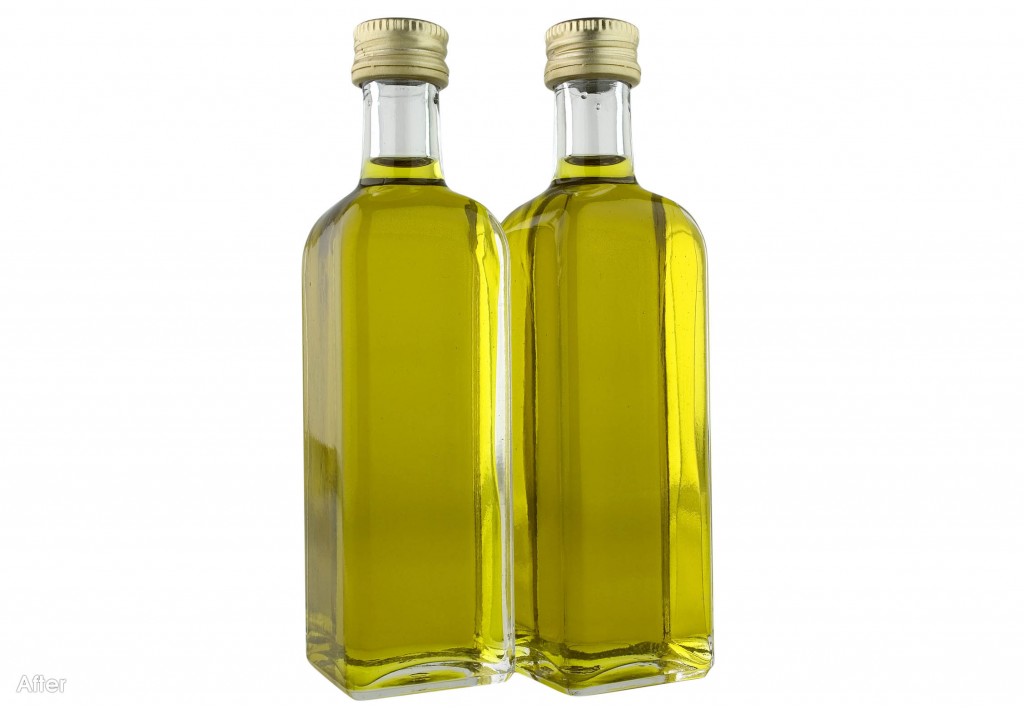
The most common photo editing techniques used to edit product photos are background removal (usually to a white background), and color correction. This is a good example of a simple before and after of a background removal service:
Before:
After:
The artist manually goes around the object and “clips” the background so it could be replaced with a white, color, or transparent background. Pricing is usually based on 2 factors: image complexity and order volume. Image complexity refers to the shape of an object. Most products such as apparel or shoes just need a simple background removal service. For products with multiple holes or mesh-like structures, select the Complex service.
If you’re ready to start scaling your photo editing workflow, contact us! We’d love to help you edit your product photos.